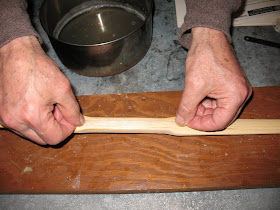
Now lift the bundle up out of the glue and use the fingers of your other hand to squigee the excess glue off of the bundle. Pictured below: Squeezing excess glue off of the sinew

I like to start in the center of the bow at the handle with my first bundle and then work a straight line out to one end of the bow; so take your first bundle, lay it down on the bow back in the center of the handle, and press it down flat. Rub it with your finger to flatten it out. Pictured below: Laying on the first bundle of sinew

You're on your way. Do another bungle and lay it up so that it just overlaps the end of the first bundle. Pictured below: Applying the second bundle

Keep extending your line of bundles down the center of the bow until you reach the end, then lap the last bundle over the end and about an inch and a half down the belly (the side of the bow that faces you when you are shooting). Pictured below: Folding sinew over the tip and onto the belly

Now you can start your second course of bundles. You want to lay these up right next to the first course but place them so that they are staggered in relation to the first course. In other words, you want to lay them like you are laying bricks so that the joints don't line up. Pictured below: Starting the second course of sinew

Keep running new courses of sinew until you have completely covered half of the bow, and then you can start on the other half of the bow and follow the same procedure. When you have the entire back covered with sinew, paint a coat of rawhide glue onto the backing and set the bow aside to dry. Pictured below: Bow with sinew backing in place

If you are going to put a second layer of sinew on the bow it is best to let the first layer set up for an hour before you start the second layer. Apply the second layer just as you did the first layer. Paint it with a coat of glue and set it aside to dry.
If you are going to apply more than two layers of sinew the first two layers must be allowed to dry completely before you add any more.
Now comes the hard part. It will take the sinew at least a week to dry out. I usually give mine two weeks because I've put too much work into the bow to have it ruined by impatience. If you string or bend the bow before the sinew is completely dry, the sinew will separate from the wood and you will have nothing. As the sinew dries it shrinks and you will probably see the bow begin to pull into a slight reflex.
So, let’s set our bow aside to dry for a week, and then we’ll finish it out.
No comments:
Post a Comment