Pages

Wednesday, August 31, 2011

Starting a Fire with a Flintlock Rifle

Here’s an interesting variation on the flint and steel fire. Old-time woodsmen often used their flintlock rifles to start a fire, and if you have a flintlock you can do the same thing

For those of you not familiar with how a flintlock works, I'll provide a very brief description of the relevant parts. The "lock" or hammer assembly is on the side of the gun just above the trigger. The outside of the lock has four main parts: (1) the hammer, which has a clamp holding a small piece of flint-rock, (2) the powder pan, which is a small pan that holds priming powder, (3) the pan cover, which is a small, hinged lid that closes over the top of the powder pan, and (4) the pan spring, which keeps a little tension on the pan cover to keep it closed. When you pull the trigger, the hammer falls and the flint rock strikes the upturned portion to the pan cover, called the frizzen. The pan cover is knocked open and a shower of sparks from the flint falls into the powder pan. Pictured below: Lock of a flintlock rifle.


As you can tell from the above description, the flintlock uses flint striking steel to produce a spark; just like you do when you use your fire steel and a piece of flint.

So, here’s how you start a fire with a flintlock rifle. First MAKE SURE THAT THE GUN IS NOT LOADED. Never, never, never try to do this with a loaded gun. The gun may discharge and injure you or someone else. After you’ve made dead certain that the gun isn’t loaded, cock the hammer back to half cock, lift the pan cover, lay a piece of char-cloth on the open pan, and close the pan cover. Pictured below: top, flintlock with pan cover raised and char-cloth in pan; bottom, pan cover closed on char-cloth.


Now all you have to do is point the gun in a safe direction (safety first, even though you made sure that the gun wasn’t loaded), pull the hammer back to full cock, and pull the trigger. The hammer will fall, the sparks will fly, and your char-cloth will be burning. Pictured below: top, Flintlock after trigger pull; bottom, glowing spark on char-cloth.


Calmly open the pan cover, retrieve the smoldering char-cloth, and place it in your tinder bundle. Blow gently and the tinder will ignite. Pretty simple huh?

Back in the day they actually made a device with a flint lock and an attached hopper to hold tinder. It was designed to do nothing but start fires. Kind of an early version of the cigarette lighter.

Speaking of cigarette lighters, you can actually use a smoldering piece of char-cloth to light a cigarette, cigar, or a pipe. I occasionally smoke a pipe, and I have used this method of lighting it many times.

Friday, August 26, 2011

Making a Fire with Flint and Steel

We’re now going to start a fire with flint and steel. Actually we’re just going to ignite our tinder bundle. The bundle will only burn for ten or fifteen seconds, so if you were doing this for real you would want to have your fire already set up and ready to push the flaming tinder bundle into it.

So, take your tinder bundle and lay it out within easy reach. Fluff the tinder up a little so that it isn’t compacted together, and be sure not to set it directly on the ground where it might absorb some moisture.

Now take your flint and hold it in a tight pinch grip in your left hand with your thumb on top (these instructions are for a right handed person). Take a piece of char-cloth and place it on top of the flint. Position one edge of the char-cloth directly over the striking edge of the flint and hold the char-cloth in place with your left thumb. Don’t get you thumb too close to the striking edge, or you may hit it with the steel when you are striking. Pictured below: top, how to hold the flint; bottom, char-cloth held beneath thumb.


Now you want to take you fire steel or file and hold it in your right hand. Lift the fire steel about a foot above the flint and bring it down fairly fast to contact the edge of the flint. Don’t bring the steel straight down. Use a kind of swooping motion. Start a little out from the flint, as your hand comes down let it move in toward the flint, and finish by pulling you right elbow out so the striker moves away from the flint after you hit it. This move takes a little practice, and you may want to practice it without the char-cloth for a while so that you can focus on getting a good shower of sparks. Pictured below: Series of three pictures showing the correct striking motion.


When you are getting sparks on a regular basis, try it with the char-cloth. With any luck at all you will have some sparks land in the char-cloth and you will see a small glowing spot or spots on the char. Pictured below: Glowing red spots where sparks have landed in the char-cloth.

Your char-cloth is now burning. Don’t panic and get in a hurry. The char-cloth will keep burning until you put it out or it all burns up. Calmly pick up your tinder bundle and lay the char-cloth on it. Gently fold the tinder bundle up around the char-cloth so that the tinder is in light contact with the char-cloth. Now blow gently into the bundle to so that the oxygen in your breath will cause the char-cloth to burn hotter. Don’t hold the bundle too close to your face or you may get singed when it ignite. Pictured below: top, char-cloth in tinder bundle; middle, tinder wrapped up around burning char-cloth; Bottom, blowing gently on tinder and char-cloth. Note that the tinder is starting to smoke.


After a few seconds the tinder bundle will burst into flame.

Congratulations, you’ve just started a fire with flint and steel.

Monday, August 22, 2011

Flint and Steel Equipment Part 3 - Tinder

The final thing we will need to start a flint and steel fire is tinder. The tinder is the stuff that will eventually burst into flame. There are many things that can be used for tinder. Probably the most commonly used items are shredded cedar bark, dry grasses, leaves, tow fibers, and jute fibers. The bark and grasses are gathered in the wild. Tow is a coarse fiber that comes from the flax plant, and jute is another fiber that is most commonly used to make twine or rope. Obviously tow and jute are not gathered in the wild. Whatever you use for tinder it must be very finely shredded, and it must be bone dry.

Cedar bark is harvested from a cedar tree. In my area we actually have juniper trees, but we commonly miss-call them cedars, and the bark works fine as tinder. All you have to do is locate a cedar tree, living or dead, and use your knife to peel off a few strips of the bark. Don’t cut down into the white. You just want the dark brown outer bark and the light brown inner bark. These will be dry, whereas the white layer beneath them is very moist. Don’t worry about harming the tree. As long as you don’t peel bark all the way around the tree, the tree will be fine. Pictured below: top, cedar bark on tree; middle, removing bark from tree; bottom, strips of cedar bark.


When you have collect a few strips of cedar bark, wad them up into a ball and crush them with your fingers, then un-wad it and twist it gently. As the bark becomes more workable you can start rubbing your hands back and forth, turning and compressing the bark. Before long the bark will start to separate into fibers. Work the bark for a good while. The finer your fibers; the easier it will be to set them on fire. Pictured below is a finished tinder bundle made of cedar bark.

Dried grass will make good tinder if it is bone dry. You need to look for a grass that has blades rather than stems. I usually don’t try to use grass here in East Texas because our climate is very humid and we get a good amount of rain, usually. Right now it hasn’t rained for over a month and it’s been over 100 degrees Fahrenheit nearly every day of that month. So right now I think grass would work. If you live in an arid climate like West Texas or elsewhere in the southwestern United States, chances are you can find some grass that will work for tinder. I saw a guy in southeastern Colorado walk out and pick a bunch of prairie grass and use it to start a fire with a fire-bow-drill, and that’s harder than starting a flint and steel fire. If you use grass you will need to work it a little bit to break it up, but not near as much as you would work cedar bark. Pictured below is some dried grass that has been worked into a tinder bundle.

Pine needles and leaf litter can both be used for tinder, but they must be 100% dead and bone dry. Pictured below: top, pine needle tinder bundle; bottom, leaf litter tinder bundle.


I don’t know of any local source for tow fibers. Tow is a rough fiber that is a by-product of making linen. Back in the day tow was used to weave rough bags. In the South we call these tow sacks. Today I only know of two sources of tow and they are to buy it at a mountain man rendezvous or order it on-line from some place like Dixie Gun Works.

Jute fibers on the other hand are widely available. Nearly any hardware store sells jute twine, and the larger jute rope can usually be found a craft stores in the macramé section. All you have to do is cut the rope or twine into four or five inch sections then pull it apart into individual fibers. I carry about ten inches of jute rope in my fire making kit so I know that I will always have dry tinder with me. All I have to do is cut off a section and pull it apart into fibers. Pictured below on top is a piece of jute rope, and on the bottom is a jute tinder bundle.


Now we have our final ingredient, so in the next post we will make a fire.

Thursday, August 18, 2011

Flint and Steel Equipment Part 2 - Making Char-Cloth

As I mentioned in an earlier post, it is from difficult to impossible to start a fire with flint and steel by striking sparks directly into your tinder bundle. I mentioned several intermediary materials that will catch a spark, and of these charred cloth is the most commonly used. So, if we are going to start a fire with flint and steel we will need to make some charred cloth, or char-cloth as it is commonly called. To make char-cloth you will need some 100% cotton or 100% linen cloth, a sealable metal container, and a fire.

100% cotton cloth is not hard to come by. You can use scraps cut from an old pair of blue jeans, an old T-shirt, or anything else as long as it is pure cotton. If it is a cotton blend it will not work. I take my cloth and cut it into inch and a half or two inch squares. Pictured below: Squares of 100% cotton cloth.

To char the cloth we are going to place it in a sealable metal container with a small hole poked in the top. I use an old shoe polish can for this. I took a 16 penny nail and punched a hole right in the middle of the top. The hole is important because it lets smoke and gasses out of the can as you heat it. Pictured below: top, Shoe polish can used for charring cloth; bottom, Can lid with hole punched in it.


When you have your can ready, fill it as many squares of cloth as you can get in the can. Pictured below: Can loaded with cotton cloth squares.

Now you will need to heat the can. You want to do this outside because you will be producing a good deal of smoke. Use a campfire or a camping stove. Don’t use the kitchen range. If you do your wife or husband will pitch a fit. I use a little Scorpion back-packing stove and make my char-cloth out on the back porch.

Now here’s what you do. Start your fire or camp stove. Take your can full of cloth, make sure that the lid is sealed down tight, and place the can directly in the fire or over the burner. Make sure that the hole in the lid is facing up. Pictured below: Charring can on Scorpion stove.

After a few seconds smoke and gasses will start coming out of the hole. You can just let it smoke, or some people hold a lit match into the smoke stream and light the smoke. Pictured below: top, smoke coming out of hole in charring can; middle, lighting smoke and gasses coming out of can, bottom, flame burning.


After a few minutes the flame will go out; or if you haven’t lit it, the smoke will stop coming out. Pictured below: No more smoke or flame coming out of can.

When the smoke stops coming out of the hole, take the can off of the heat source. It will be hot, so use a hot pad or some tongs. DO NOT open the can immediately. Let it cool all the way down until you can handle it with your bare hands. Remove the lid and you should have a stack of black charred cloth in the can. Pictured below: Open can showing stack of finished char-cloth inside.

Remove the cloth carefully as it is now very fragile. Congratulations, you have just made char-cloth. Pictured below: The finished product, char-cloth.


Sunday, August 14, 2011

Equipment for a Flint and Steel Fire – Part 1

To start a fire with flint and steel you need four basic things; a flint rock, a piece of high carbon steel, some char-cloth, and some tinder. Let’s examine these one at a time and get you properly outfitted to start a fire with flint and steel.

First the flint. I have started a fire with a tiny piece of flint no more than half inch by half inch, but we will start off with something a little bigger so you don’t mash up your fingers while learning how to strike the flint. I would recommend that you start of with a flint that is about two inches by two inches and maybe about three eights of an inch thick. Where do you find flint? Well, it’s not always easy to find. In my area (East Texas) there is none. At my sister and brother-in-law’s place in northern Arkansas it’s everywhere. You’ll just have to look around. Sometimes flint is used to grade railroad right-of-ways, and I have found some decent pieces of flint walking along train tracks. What you are looking for is a very smooth grained shiny rock that has an, almost, glass like surface. You can’t go by color because flint comes in white, tan, brown, yellow, gray, and black. Pictured below at the top are several different pieces of flint. On bottom is a close-up of a piece of dark gray flint showing the smooth, almost glass surface.


Remember that when you hit the flint with your steel it is not the flint that is sparking. It is the steel fragments that the flint scrapes off of your steel that burn, so you need a sharp edge on your flint. Not a razor thin edge because that will just break off. Kind of a blunt edge is what you are looking for. Pictured below is a side view of a flint to give you the idea of what it should look like.

If your flint doesn’t have a good edge you can put one on it. Take another rock or a piece of metal and smack down on the edge of the flint. Be sure to wear safety glasses when doing this. When the flint breaks it will probably leave a good edge for you to work with. If it doesn’t break right, just throw it away and look for another piece.

Now that you have a piece of flint, you will need something to strike it with. As previously mentioned, you will need a piece of high carbon steel. You can buy fire steels at mountain man rendezvous or you can order them from companies like Dixie Gun Works or other places that cater to early American re-enactors. If you don’t want to go to that trouble, you can use a piece of an old shop file. Files have a good carbon content and are about the right temper for a fire steel. Pictured below are three different store bought fire steels and a couple of pieces of broken file.

Now you have a flint and steel. In the next post we will learn how to make char-cloth and prepare tinder.

Wednesday, August 10, 2011

Starting Fire with Flint and Steel – How It Works and Why It’s Not Really a Good Survival Plan


For hundreds of years prior to the invention of the safety match, flint and steel was the most commonly used method of starting a fire. The mechanics of flint and steel are pretty straight forward. You strike a flint rock with a piece of steel which produces sparks. The sparks fall into a combustible material where they take hold. The combustible material is transferred to a bundle of finely shredded tinder, and you blow on the combustible material to expand the spark and make it hotter. When the heat reaches a critical temperature the tinder bundle ignites.

Starting a fire with flint and steel is a skill that is still widely practiced by re-enactors of the French and Indian War, the Revolutionary War, and the American fur trade. When I was a kid ever Boy Scout in my troop was expected to start a fire with flint and steel and bring a pot of water to a boil in less than five minutes. Sadly, this is a skill that is no longer taught in scouting.

Now for the movie myths about starting a fire with flint and steel. In a scene from a popular movie about a young boy stranded alone in the Alaskan wilderness, the boy throws his new stainless steel axe and it hits a rock creating a shower of sparks. He gets a great idea. He picks up the rock, gathers a bundle of dry grass, and then bangs the rock and axe together making the sparks fall into the grass. The grass bursts into flame, and the boy has created fire. Nice movie scene, but it will never happen. Here’s why: Most people thing that when flint and steel produce sparks, it’s the flint that is sparking. Actually it is little fragments of the steel that are burning. A hard, sharp edged rock like flint will shave tiny pieces off of the steel, and the heat created by the friction of flint dragging across steel is sufficient to make the steel burn. Now, for the steel to burn it must have a very high carbon content, and stainless steel does not have a high carbon content. So, it won’t produce sparks. If you don’t believe me take any modern stainless steel knife and bang away. You won’t get any sparks.

The second reason why the above scenario wouldn’t work has to do with the heat of the sparks produced by striking flint to steel. The sparks produced by striking flint to steel are not hot enough to directly ignite a tinder bundle like dried grass or shredded cedar bark. To get the bundle to ignite you first have to catch the spark in an intermediary material that will catch the spark and ignite into a weak glowing burn. This material can then be transferred to the tinder bundle where a little blowing will cause the glowing material to burn hotter and will keep it in contact with the tinder for a longer period, allowing the heat to build up to the point of combustion.

The most commonly used intermediary material for starting a flint and steel fire is char-cloth. Char-cloth is cotton or linen cloth that has been burned inside of a nearly air-tight container so that it turns into a fragile, blackened char that is easily ignited.

Other things that I have personally used as char include charred fungus from a tree, and charred punk wood, which is a soft rotted wood. I have also read about a particular type of fungus that will catch a spark without charring if it is thoroughly dried. I believe it, but I’ve never seen it or tried it myself.

In fairness to the legend of striking sparks directly into natural tinder and starting a blaze, I have heard that it can be done. But I’ve never done it, and of the hundreds of people that I personally know that can start a fire with flint and steel, none of them can do it. So, I would say the chances of the average Joe making this work are not good.

There are a couple of man-made substances that you can ignite will a flint rock and steel. These are 0000 steel wool, and gun powder. I find it unlikely that you will come across any steel wool in the wilderness, but if you are hunting you will have some ammo. If you open a cartridge and pour out the powder, you will have something that you can light with flint rock and steel.

So, I don’t really consider fire by flint and steel to be a great option for survival fire starting. To start a flint and steel fire under survival circumstances you would need to have or find something made of high carbon steel, you would have to be in an area where flint rocks can be found (not as common as you would think), and you would have to be able to identify and dry some of the mystery fungus that doesn’t need to be charred, or stumble across an old campfire that contains some charred punk wood. Sounds pretty iffy to me. Of course you could carry a flint and steel kit with you everywhere you go, but wouldn’t a disposable lighter be easier?

With all that said, let’s learn how to start a fire with flint and steel anyway. You never know, and besides it’s kind of fun. In the next post we’ll start getting our equipment together by finding a flint rock and selecting a fire steel.

Saturday, August 6, 2011

Fire Starting – Carry Along Fire Starters

The easiest way to assure that you can get a fire started in an emergency situation is to always have fire starting equipment with you. There are numerous primitive ways to start fire which we will discuss in subsequent posts, but for heaven’s sake, how hard is it to carry a disposable lighter in your pocket? Even if you don’t smoke, carry a lighter. I keep a lighter in my pocket and two lighters in each of my vehicles. Another good thing about a disposable lighter is that you can use it to start fires even after it is out of fuel. The spark produced by an empty lighter is hot enough to ignite finely shredded tinder. Pictured below: Disposable lighter.

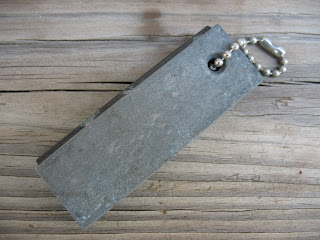
Another handy device is the hot match. The hot match is a metal rod that emits a shower of sparks when you drag a knife blade down it. I carry one that has a plastic finger grip with a hole in it. It fits easily on a key ring and is virtually unnoticeable. I’ve had the one I carry for years and used it to start many fires. Pictured below: Hot match on key ring.

A similar but more bulky fire starter is widely available at sporting goods stores. This starter is a small bar of magnesium with a striker embedded along one side. To use this starter you take a pocket knife and shave magnesium off of the bar into a small pile. You then drag your knife blade down the striker, directing the sparks into the pile of magnesium shavings which will ignite with a white-hot burst of flame. The advantage of this fire starter is that the magnesium burns so hot that it will ignite fairly course tinder or tinder that is slightly moist due to high humidity. Pictured below: Magnesium fire starter.

Of course the old stand-by for starting a fire is matches. Be sure that you are using strike-anywhere matches and not the strike-on-box matches that are more common. Matches should always be carried in a water-proof container, and even then I like to water-proof each individual match by painting it with clear fingernail polish. After I paint the matches I stick them in an old piece of florists foam to dry. If you are really confident in your fire starting abilities, you can cut your matches in half. This way you can double stack them in the match container and have twice as many fire starters. I also include a small strip of medium grit sand-paper in my water-proof container. This will assure you of having a surface that you can strike your matches on. Matches that are painted with clear fingernail polish and kept in a water-proof container will keep for years. Pictured below from top: strike-anywhere matches and clear nail polish, painted matches drying, matches cut in half, matches and striking strip in water-proof container, container of matches closed.


One reliable device for fire starting that will last indefinitely is the magnifying glass. Magnifying glasses have been used for centuries to start fires. They were commonly carried in the 19th century. I have an old survival kit that my father carried in WWII and it has a magnifying glass in it. The magnifying glass is used to focus the Sun’s rays into a bright white dot that is aimed into a bundle of finely shredded tinder. Depending on the intensity of the Sun’s light you may to be able to ignite a tinder bundle in as little as fifteen or twenty seconds. Of course the big drawback to a magnifying glass is that you must have sunlight. If it is night time, if the Sun is too low in the sky, if you are under dense foliage, or if the day is cloudy, a magnifying glass is of no use. But considering the small size of a glass it is a good thing to include in your survival gear. You can start your fires with the glass when conditions are right and save matches and lighter fluid for times when the glass won’t work. Pictured below: top, magnifying glass; middle, magnifying glass focused on a bundle of tinder; bottom, tinder igniting.