One of the things that I promised myself that I would do
after I retired was to start grinding all of my own wheat and baking all of our
bread. I have owned a small Victorio
grain mill for a couple of years, and I have used it occasionally with good
results; but I felt that if I was going to grind two to four pounds of wheat
every week that I needed to have a better mill.
I have wanted a Country Living Grain Mill for a while, and my wife
finally took the hint and bought me one for Christmas. I unpacked it and set it up about a month ago
and started grinding away, so I thought I would do a post about my impressions
of this mill.
First of all, everything that you have heard about the
quality of this mill is true. It is
super well made. You can look anywhere
on the net and get all the specs about the materials and design of this mill,
so I won’t belabor all of that.
I will make one comparison between the Country Living Mill
and the Victorio Mill. The grinding
plates on the Victorio Mill are approximately 1 3/8 inches in diameter, whereas
the grinding plates on Country Living Mill are approximately 4 5/8 inches in
diameter. So turning at the same
revolutions per minute the Country Living Mill will process way more grain than
the Victorio Mill. But, here’s the
drawback; the turning radius of the handle on the Victorio Mill is 6
inches. That’s a 6 inch long handle
turning a 1 3/8 inch diameter grinding plate.
The Country Living Mill has a handle with a radius of about 5 ½
inches. That’s a 5 ½ inch long handle
turning a 4 5/8 inch diameter grinding plate.
Guess which one is easier to turn.
But remember, it’s a trade off.
The Victorio is easier to turn, but you have to turn it a lot more times
to grind the same amount of grain. Top, Victorio grinding plates; bottom, Country Living
grinding plates.


Country Living sells an extension handle that gives you a
little bit better mechanical advantage when hand turning the mill, but I
decided to skip right past all of that and go straight to peddle power. I kept my eyes open at the local thrift
stores for a few weeks until I came across an old Sears exercise bike. This is a super basic machine. Just a seat, handle bars, peddles, and a
wheel. I picked it up for $9.99, and it
was perfect for what I needed.

The wheel has a hollow but rigid tire on it. I was able to use a utility knife and trim
off the outer half of the tire.

The
inner half of the tire remained firmly fixed on the wheel and since the tire was
hollow, it left a nice groove to slip a V-belt around.

The Country Living mill has a large pulley on it that is
already set up for a V-belt, so it would be a simple matter to link the bicycle
to the mill once I had them both mounted on some kind of a platform.

Never one to waste a dollar, I dug around in the shop and
came up with a couple of old two-by-tens and a two-by four that I could
re-purpose to make the platform.

Before I could start cutting and building, I had to find a
V-belt that would be long enough to go around the mill pulley and the bicycle
wheel/drive pulley. This ended up being
my biggest expense on the project. I
bought a V-belt that is used to drive the blades on riding lawnmowers. It cost me $21.00 and change at Home Depot.

Once I had obtained a V-belt, I did some rough calculations
as to how long the platform would needed to be, cut all my lumber, and screwed
everything together with some old dry-wall screws.


When mounting the mill it is important that the mill pulley
is in the center of the platform where it will line up evenly with the drive
wheel on the bicycle.

I used the mill as a template to mark where I needed to
drill mounting holes, and bolted the mill down.


I wanted to mount the bicycle so that it would keep good
tension on the V-belt, but I didn’t want it to be so tight that it would cause
undue wear on the bearings in the mill.
I decided to nail a board across the platform that would hold the front
feet of the exercise bike in place and keep the bike pulled back tight away
from the mill. What I ended up doing was
putting the belt on the mill and the bike, laying the loose board across the
platform, and then pushing the board (and bike) back as hard as I could by
hand, and marking the position of the board.
I then unhooked the belt and moved the bike out of the way. Now I scooted the loose board 3/8” farther
away from the mill than my mark and then screwed the board down. When I positioned the bike behind the board
and reattached the belt, the belt was tight enough that it actually held the
back end of the bike about an inch up off of the platform. When I sat down on the bike it snugged the
belt up nice and tight so that when I peddled the bike, the mill hummed right
along. It was not necessary to make any
kind of permanent attachments to hold the bike down on the platform.

That pretty much completed the project.

I did build a little removable platform that
holds my flour bin under the grinding plates of the mill.

I loaded up the hopper on the mill and did a
little test run.

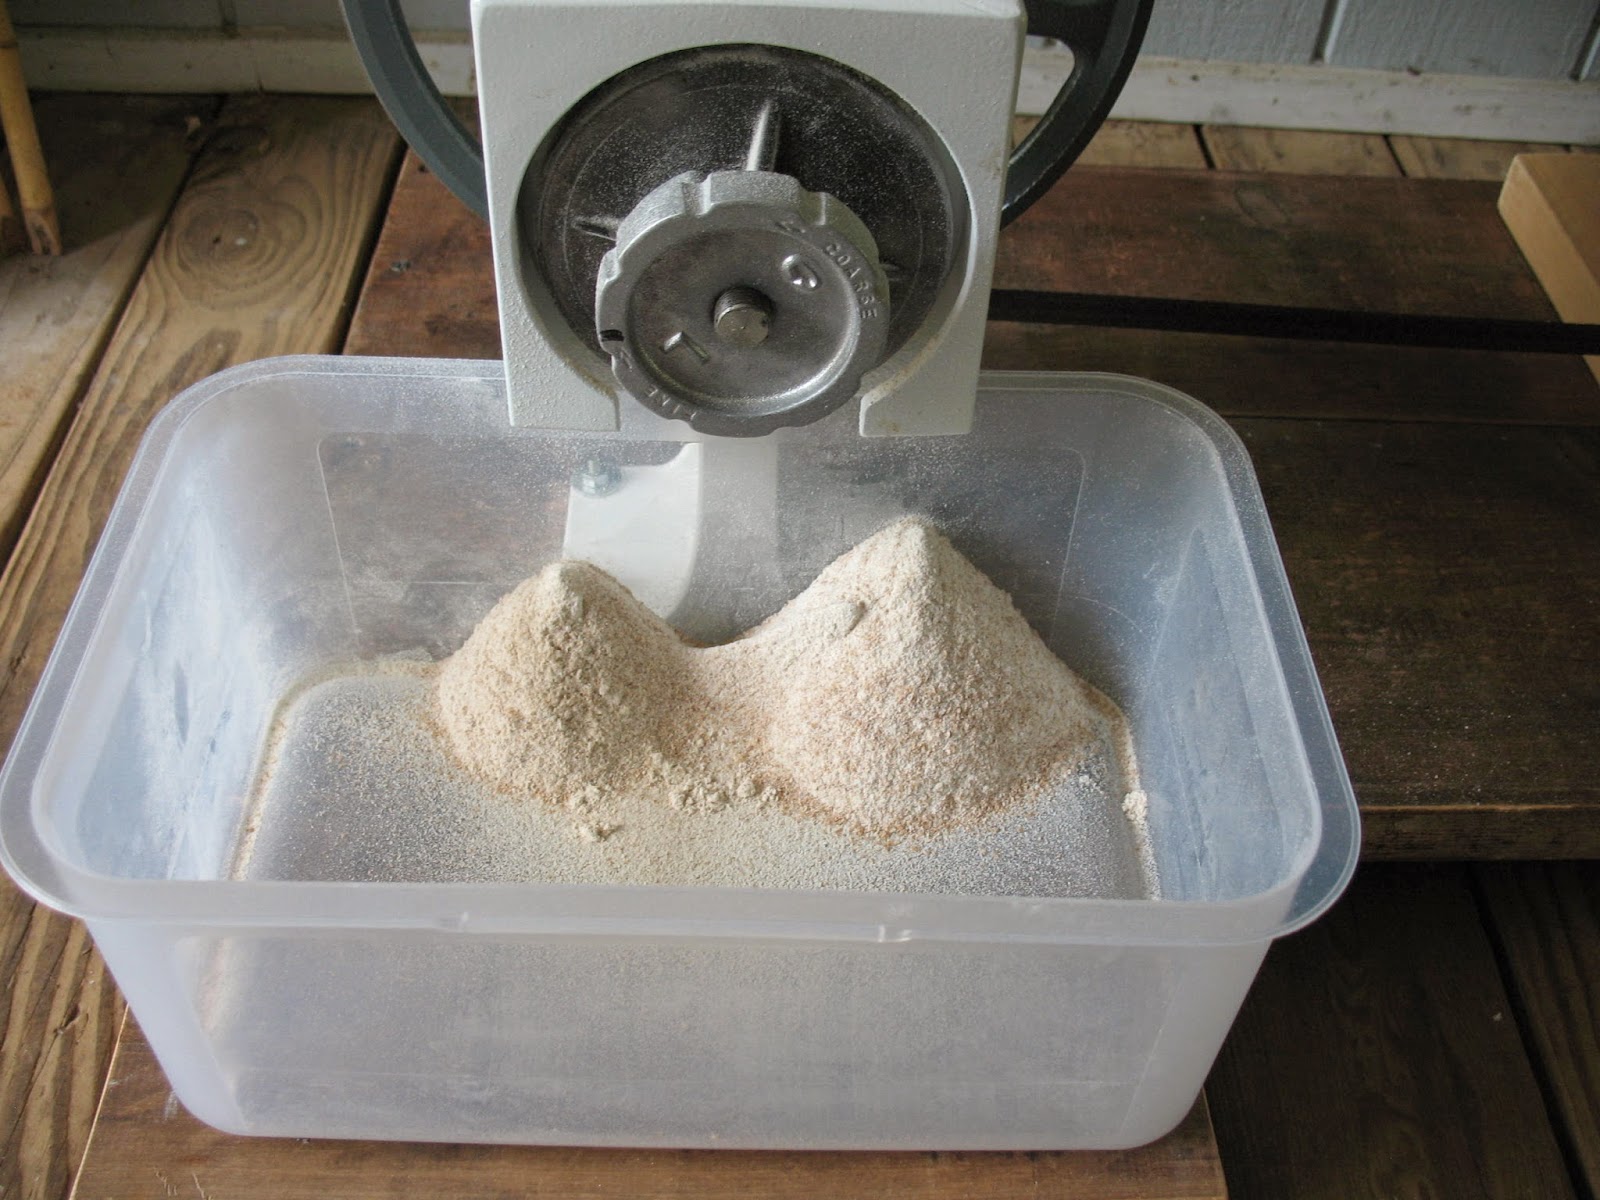
It worked fine. Much
easier than turning by hand, but still a pretty good workout. Speaking of workout, be sure and remove the
tensioning knob from your exercise bike if you build a set-up like this. The mill will give you a good workout without
adding any more resistance to the peddles.

