If you live in an area where peanuts will grow; you must
learn how to plant, raise, harvest, and cure them. Peanuts are an outstanding survival crop that
has long been raised in the southern United
States, that’s right Virginia, they’re not just a snack or an
ingredient of candy bars. They are
highly nutritious.
So what’s so great about peanuts? Well for one thing they are loaded with
protein. Peanuts have about 6.7 grams of
protein per ounce, more than eggs or milk.
Peanuts are also loaded with fat.
Not such a good thing if you are trying to watch your weight, but
remember, in a survival situation fat is one of the hardest food substances to
come by, and the human body must have fat.
Peanuts are really not nuts at all. They are a legume like field peas and
beans. And like other legumes, peanuts
actually improve the soil that they are planted in by adding valuable nitrogen.
The first step in raising a good crop of peanuts is to make
sure that you have your soil right.
Peanuts like a really light sandy soil, so if you have heavy clay you
will need to amend the soil before you plant. In my part of the world you can
buy planting peanuts at the feeds stores and many hardware stores.

What you are buying is raw peanuts in the shell. They look just like the ones that you buy at
the circus, but they are not roasted.
The peanuts that I bought this year were $3.50 US per pound, and a pound
of peanuts will plant a pretty good size bed.
This year I planted a small bed of about thirty-five plants, so I only
used a handful of seed. It yielded about
a gallon and a half of peanuts in the shell.
To plant the peanuts all you have to do is shell them out
and stick them in the ground.

I plant
mine about an inch deep and a foot-and-a-half apart in each direction. No fertilizer is necessary, but peanuts do
like heat and a lot of water. Don’t
drown them, but do keep the ground moist.
In a few days they will break the ground and start growing.

Peanuts will grow about eighteen inches to two feet tall and
put on small yellow blooms, and then they will do something really
unusual. The stems of the plants will
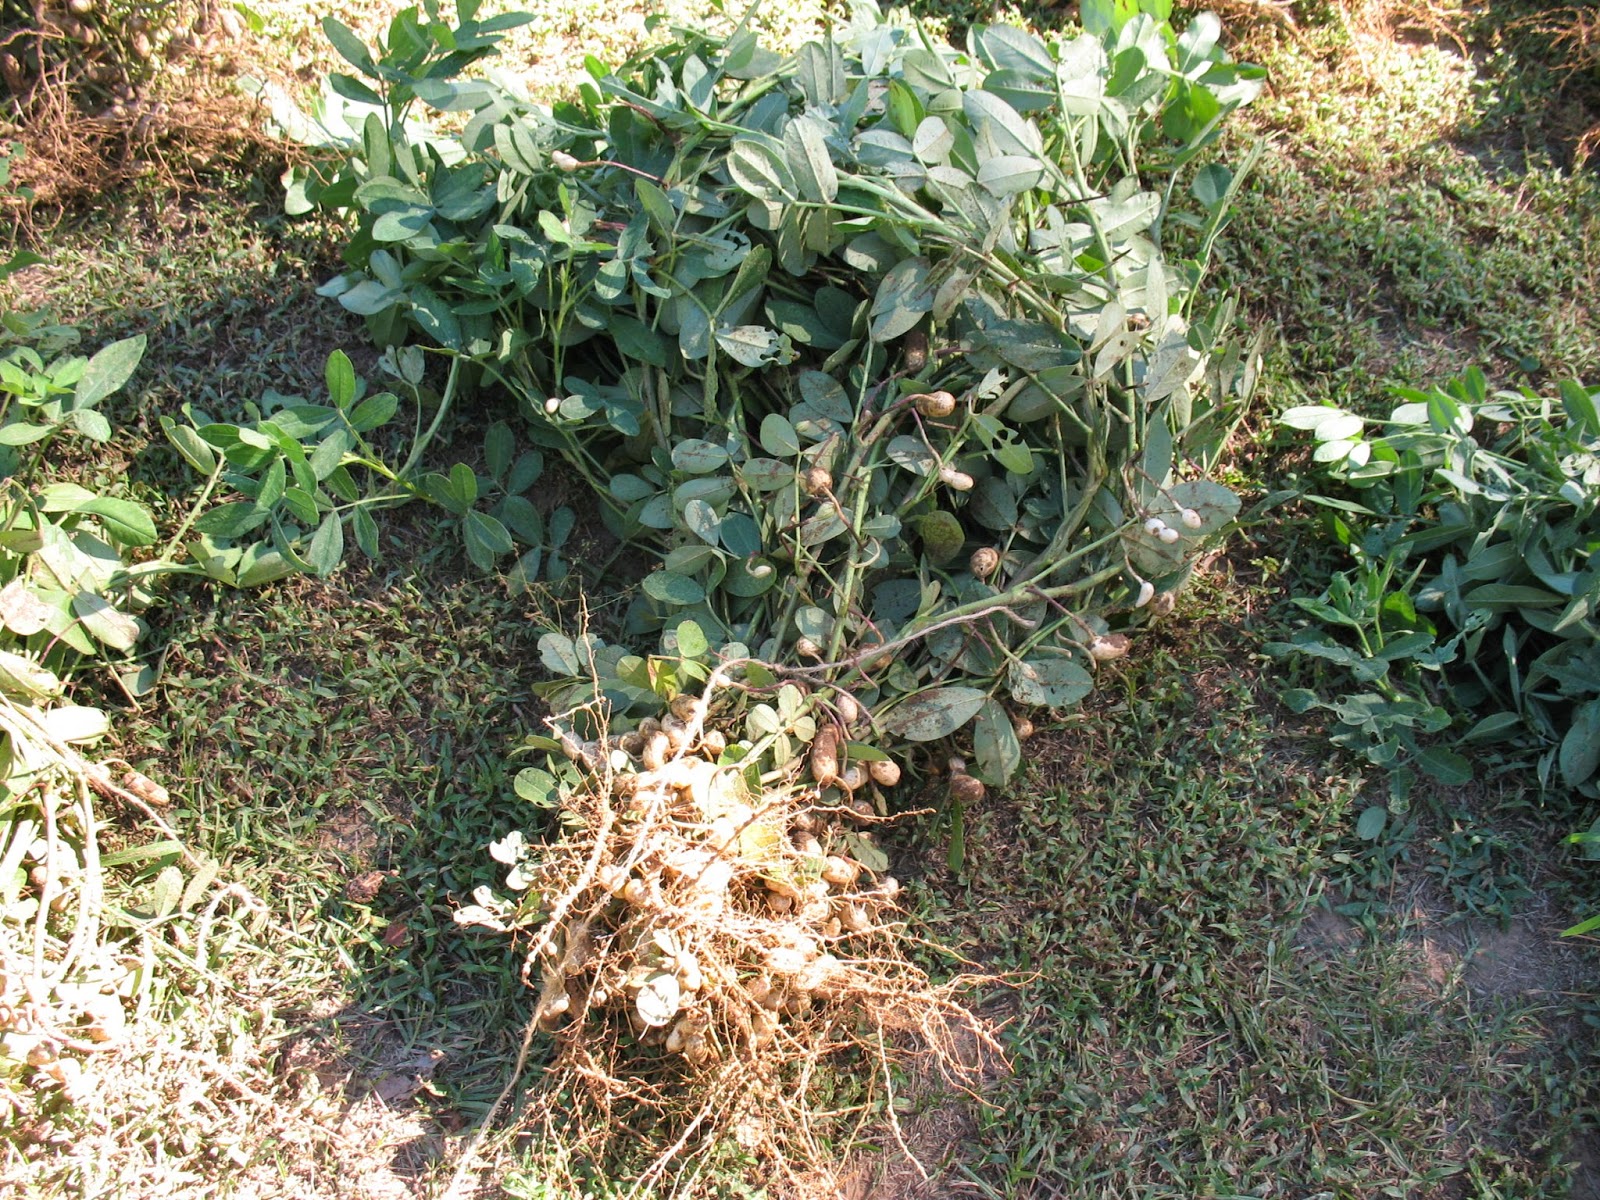
bend over close to the ground and put off small dark tendrils called pegs. These pegs will actually grow down into the
ground and a peanut will form underground at the end of each peg.


Peanuts will also form in a cluster around the main roots of
the plant.

You want to pull you peanuts when the vines first start to
yellow. Pulling the peanuts at the right
time is a little tricky. If you pull
them too early, the nuts will not have completely formed. If you squeeze the shell and feel that it is
not filled out inside, you will know that the peanuts are not ready. If you
pull the peanuts too late, some of them will already have sprouted
underground. This is easy to see. The problem is that you can not pull the
plants at a time when all of the peanuts will be perfectly ripe. It’s like trying to pull a tomato plant when
all of the tomatoes are ripe. It just
doesn’t happen. So you need to pull the
peanuts when most of them are ripe. You
may have a few that aren’t filled out, and you may have a few that are over
ripe; but that’s OK.
If the ground is too hard, use a fork to loosen it a little;
but stay well out from the plant and be careful. Pull the whole plant and don’t remove the
peanuts. When you have a bundle of
plants about as big around as your arm, use a string to tie them in a bundle (shook).

Hang the shooks up under cover to dry. You
can shake them a little to remove some of the dirt but don’t wash them.

Leave the shook hanging to dry for a week.

When they are dry take them
down and remove the peanuts. Again,
don’t wash the nuts. If they are dirty
just rub off what you can with you fingers. The vines are very rich in nutrients so you need to either compost them
are feed them to your stock. If you use
them for feed, go easy as animals can founder on too much at one time.

Spread the picked peanuts out in a dry shady spot and let
them cure for another two weeks.

At the end of the two weeks they are ready for use. You can shell them out and eat them raw or
you can roast them in the shells for snacks.
Be sure to save some for next year’s seed.


