Raw hide can be made with the hair still on the hide or with the hair removed from the hide. Rawhide has many uses. It can be used to bind things together. It can be used to make containers, knife sheaths, arrow quivers, bullet pouches, and many other items.
There are many different ways to go through the process of turning an animal hide into rawhide. None of them is any better or worse than the others. Many people say that a hide must be fleshed as soon as you get it to avoid fat burning the hide. Immediate fleshing is the ideal, but modern schedules sometimes make this very difficult to do. For example: the hide that I am using in this article was given to me on a Monday at work. A friend of mine had been deer hunting over the weekend, and he knew that I would want the hide, so he saved it and brought it to work. Now at this time of year it is getting dark by the time I get home, and frankly, after a long day at work I’m not looking all that forward to fleshing a deer hide when I get home. This is work best left for the weekend, but if I don’t want the hide to spoil in the mean time I need to either freeze it, or I can use the method below to go ahead and start the process and still keep the hide from spoiling.
To make raw hide you first need a hide. To make your first rawhide I would recommend that you use a white tail deer hide. A white tail hide is big enough to do things with, but it is small enough that it won’t wear you out to prepare it. When a hide is first removed from an animal and nothing has been done to it, it is referred to as a “green hide.” Pictured below: Green whitetail deer hide.

So take your green deer hide and take a look at it. You will probably see a lot of meat scraps and membrane on the flesh side of the hide. Normally you would flesh the hide immediately, but if you don’t have time to flesh the hide immediately you can use this method.
First take a five gallon plastic bucket and put one or two coffee cans full of ashes in it. It is best to use a combination of hardwood and softwood ashes. Straight hardwood ashes will make your soaking solution too alkaline and may damage the hide. About half-and half, hardwood and softwood will do the job without damaging the hide. Pictured below: Removing ashes from my wood stove and putting them in a plastic bucket.

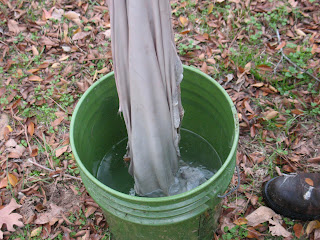
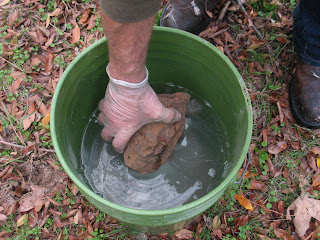
Now fill the bucket about two-thirds full of water and stir the ashes up. Drop your un-fleshed hide into the bucket, stir it around a little, and set a rock on top of the hide to hold it down under the water. Pictured below: top, Filling bucket with water; middle, Dropping un-fleshed hide into the bucket; bottom, weighting the hide down with a couple of rocks.


Normally if you didn’t flesh the hide right away the fat in the meat would begin to decompose and would produce acids that would begin to dissolve the hide. But the ashes in the soaking solution contain lye which counteracts the acid in the decomposing meat and prevents the hide from becoming fat burned.
Leave the hide in the soaking solution for five days, stirring it around a little each day, and then check to see if the hide is ready by pulling on the hair. If the hair pulls easily out of the hide, you’re ready to go on to the next step. If the hair doesn’t come out, leave the hide in the soaking solution and check it again in a couple of days. The temperature has a lot to do with how long the hide needs to stay in the solution. In cold weather I have left hide in the bucket for two weeks before they were ready. In hot weather it may only take three days.
When the hair slips easily from the hide, you can remove the hide from the solution, rinse it of with a water hose, and put it on your fleshing beam. When I used to do a lot of hides I had a fleshing beam that was made of a log that was leaned up on top of a stump. I don’t do so many hides any more so I just use a six inch wide sawhorse to do my fleshing on.
To flesh the hide you can use a dull knife, or a dull draw knife, but I have found that the best tool for the job is a bone hide flesher of the kind that was invented at least 20,000 years ago. Pictured below: A deer bone hide flesher.


I say that it was invented at least 20,000 years ago because a bone hide flesher is the oldest carbon dated artifact that has ever been found on the North American continent. They were probably used for hundreds of thousands of years in other parts of the world. Whatever you decide to use, you need to remove all of the flesh and as much membrane as possible from the flesh side of the hide. Pictured below: Using the fleshing tool to remove meat and membrane.

When you have the hide fleshed you will need to remove the hair from the outside of the hide, so flip the hide over and start scraping hair. It should come out pretty easily. Pictured below: Hide that has been fleshed and de-haired.

After all the hair has been removed rinse the hide again and place it in a bucket of clean water to soak over night. Adding a little baking soda will help take any bad smells out of the hide and will neutralize any remaining alkali. The next day pour off the dirty water from the bucket, refill the bucket with clean water, and soak the hide for another day. Pictured below: top, Adding soda to a bucket of clean water; middle, Placing hide in the bucket; bottom, weighting the hide down with a rock.


Now all that’s left is to let the hide dry out. Some people cut little holes in the edge of the hide and lace the hide into a frame to dry. I find this to be a total pain. I prefer to nail the hide up on the outside of my shop and let it dry. I use small finish nails, about an inch-and-a-half long and place them about six inches apart all around the outside edge of the hide. Don’t try and stretch the hide too much when you nail (or lace) it up. The hide will shrink quiet a bit as it dries, and if it has been stretched too tight it will tear out at the nails/laces. Also, if it is stretched too tight it will dry very thin. Pictured below: top, Wet hide nailed up on the wall of my shop; bottom, hide after it has dried for a few days.


When the hide is thoroughly dried you can take it down off of the wall, trim the rough edges off, roll it up, and put some tape or a rubber band around it. Store your rawhide where it will be protected from moisture, mice, and the family dog. If the rawhide is placed in water for a couple of hours it will soften again and stretch out. When it dries it will, once again, become hard and stiff. Pictured below: top, Dried and trimmed hide; bottom, hide rolled up and taped for storage.


The pictures below illustrate some of the uses of rawhide. At the top is a bowstring made of rawhide. Picture number two shows how rawhide is used to bind on an axe head. The next picture is of a knife sheath made from elk rawhide. The bottom picture shows a rawhide bullet bottle.


