Pages

Sunday, December 16, 2012

Learn to Shoot a Pistol with Accuracy


Many people buy pistols for self defense but few people really know how to shoot a pistol with any kind of accuracy.  The relatively short barrel and the short sight plane make a pistol more difficult to fire accurately than a long gun.  Learning to fire a pistol accurately is basically the same as learning any other physical skill; it takes time, practice, and a methodical approach.

I suggest that you learn to shoot a pistol with a .22 caliber revolver.  There are several reasons for this:

1. The ammo is cheap
2. The recoil is light, so you won’t be as likely to develop a “flinch”
3.  A revolver allows you to load chambers in a random pattern leaving some of them without a cartridge (the reason for this will be explained in a moment)

You will need to use the same size target and shoot from the same distance at every practice session when you are first learning to shoot, so buy or print a pile of targets.  You will also need to record each and every shot that you make, so I recommend that you buy a small notebook and print off a bunch of miniature targets that look like the one that you will be shooting at.  Cut the small targets out and glue them into your notebook, and you will be ready to go to the range.  Be sure and take hearing protection, a pair of binoculars or a spotting scope, and if you want to make your targets last longer take a roll of masking tape and a black marker with you.  This way after you fire ten or twelve rounds at your target you can tape over the holes.  If you hit the bull, you can use the black marker to color the tape black.

At the range you want to set up your target in a safe shooting location, then pace off twenty-five yards and draw a shooting line on the ground.  I like to set up a small table to hold my ammo, binoculars, notebook, tape, etc.

The first time that you shoot, you want to do something that is a little unusual but is very effective for teaching proper trigger pull, and this is why I recommend that you use a revolver.  If your revolver holds six rounds, load it with four rounds in a random pattern.  If your revolver holds nine rounds like mine, then load it with six rounds.  Don’t leave the empty chambers right next to each other, space them randomly around the cylinder.  Now spin the cylinder, and without looking at it, close the cylinder.  Now when you thumb the hammer back, you don’t know if it will be falling on a live round or an empty chamber.

When learning to shoot you always want to fire single action, so step up to the line and assume a good shooting stance.  Your feet should be about shoulder width apart facing straight ahead.  Your hips and shoulders should be square to the target.  If you are right handed your left foot should be about 14 to 18 inches in front of your right foot, depending on how tall you are.  Hold the gun with both hands.  The right hand should be wrapped around the grips with the index finger extended.  The left hand should cup under the butt and come up onto the left side of the grips.  Arms should be relaxed and bent slightly at the elbows.

When you are comfortable with your stance, thumb the hammer back and place the first digit of your right index finger on the trigger.  Sight down the barrel so that the top of the front sight fills the slot in the back sight with the top of the front blade dead even with the top of the wings on the rear sight.  The center of the bull should be sitting right on top of the front sight.

Now draw in a breath, exhale half of it, and relax.  Keeping the gun on target squeeze the trigger  slowly.  If you are squeezing the trigger properly you should not know exactly when it is going to fall.  It should be a complete surprise to you.  This is the hardest thing for most people to learn, and this is where the empty chambers in your cylinder will really help you in developing the correct trigger pull.  When you squeeze the trigger the hammer may fall on an empty chamber.  If the happens, take note of your reaction.  Did you jerk when the hammer snapped down?  If you did it means that you knew when the hammer was going to fall, and you jerked in anticipation of the discharge.  If you are squeezing the trigger properly, you should not know the exact moment when the hammer will fall, and so you can’t anticipate the discharge and you won’t flinch.  You should use this method of leaving random chambers empty until you never flinch.  You’ll be surprised at how quickly you will overcome flinching, and you will be amazed at the difference it makes in the accuracy of your shooting.

Each time you discharge a round you should stop, lay your pistol down, look at the target through your binoculars, and mark the target in your notebook at the exact spot the round hit on your target.  Then pick up the pistol and fire another round.  This is very time consuming, but it will make you pause and consider each shot and what you might have done wrong.  In no time at all you will start shooting tighter and tighter groups, even if you don’t know exactly what corrections you are making.  Don’t ask me how it works.  Maybe a brain researcher can explain it.  I just know that it does work.

Please don’t get in a hurry.  When I was learning to shoot, I made it a point not to shoot more than a hundred rounds per practice session.  Slow and steady wins the race.  Just be patient, be methodical, and keep practicing.  The results will be well worth the effort.

Tuesday, December 4, 2012

Home Preparedness Guidelines


Before you start on a program of home preparedness there are several questions that you need to ask yourself:

(1) What am I preparing for? 

This list could include short-term power outage, seasonal weather like tornadoes or hurricanes, earthquake, unemployment, interruption to the economic system, collapse of the economic system, break-down of the social order, insurrections or riots, nuclear or biological war, electro-magnetic pulse attack, asteroid collision, and who knows what.

(2) Am I currently living in a survivable and defensible location?

Are you in a big city? (not good)  Do you live in a small town? (better)  Do you live in a rural community? (better still)  Do you live on a farm at least two hours from a major metropolitan area? (very good)  Are you well established on your farm with a good support group of like-minded neighbors? (best)

(3) What kind of financial resources do I have to devote to preparedness?

Preparedness is an investment, just like a bank account or stocks and bonds.  Some people live paycheck to paycheck and don't have funds for investment.  Don't let this stop you from preparing to the extent that you can.  Some people have money to invest, but they spend it on things that they want in the here and now.  Not a good approach to home preparedness or to life in general.  If this is you, you're probably not reading this anyway.  Some people invest in bank accounts, stocks, bonds, 401K's, life insurance, health insurance, long-term disability insurance, etc.  A person with this kind of money to invest can easily redirect part of their investment to home preparedness.  The amount would depend entirely on what level of commitment the individual wants to make, but I wouldn't cash in my 401K or cancel my life insurance for the sake of preparedness.  Keep things in perspective.  You're a lot more likely to retire than you are to get hit by an asteroid.  I hope.

So how should you go about preparing?

Home Defense

I believe that no amount of food, water, medical supplies, tools, farming equipment, or coin can save you if someone else can take them away from you.  Of course you can just chalk it up to me being a Texan, but the first thing I would recommend is a weapon to protect yourself, your family, and what you already have.  If you will have only one weapon, I recommend a good reliable 12 ga. pump shotgun and a variety of ammo including bird shot, duck and turkey shot, buckshot, and slugs.  If you want to invest more extensively in home defense and hunting weapons, see my posts on "Five Guns for the Homestead."

Heat

Depending on where you live, and what time of year it is; you could be dead long before you have a chance to die of thirst or starvation.  Hypothermia, or the loss of body heat, can kill you just as dead as a bullet from an AK-47.  You need a source of heat if the power goes out.  It can be as cheap as a propane camping heater for the short term, or it can be as expensive as a high quality wood burning stove that will last for decades.  There are many choices between these extremes so pick one that fits your budget and invest in some heat.
Light

A source of light is not really necessary for survival, but it sure does make it easier.  My power never seems to go out during the daytime.  Getting to the breaker box in a dark closet to flip switches, and going out into the dark night to get the generator running is nearly impossible without some kind of light.  If you're going to use flashlights, make sure that you have fresh batteries.  Mine never did so I bought plug-in rechargeable flashlights that stay plugged into a wall socket until needed.  I also bought several hand cranked flashlights.  Again, light is not absolutely necessary for survival; but it's cheap and very helpful.  Get some flashlights.  I also have kerosene lanterns in every room, a propane camp light, and lots of candles for longer term situations.

Water

Three days is about all that you can survive without drinkable water, and you need a minimum of a quart a day just to stay alive.  A gallon a day per person is more realistic.  Water is cheap.  There's no reason not to lay in a supply of drinking water in plastic bottles.  Several cases will fit under your bed.  For longer term situations you can look into a cistern or a water well.  These are both still very common in rural areas.

Food

Food is where a lot of people start a preparedness program, but as you can see it's way down on my list.  The explanation for this is simple.  The average person can live for three weeks without food.  Of course nobody, including me, wants to go that long without a meal.  How much food to store and what kind of food to store depends on how many people you are feeding and for how long.  I would say that the bare minimum should be one week's food for each person in your family.  This would be for a short-term situation and could be made up of canned goods and dried foods.  The longer that you are planning for, the more thought you will have to put into your food storage program.  One thing I would definitely advise is not to store a bunch of stuff that you don't normally eat.  Keep a rotating stock of items that you already eat and replace them with more as you consume them.  I had a neighbor that bought buckets and buckets of nitrogen packed hard red wheat.  He never ate a tablespoon full of it, and ended up giving it all away just before it expired.  Lots of money down the drain.

Medical Supplies

Most homes have a medicine cabinet with basic first aid supplies and over-the-counter medications.  That's a good thing, but make sure that they are fresh, and if you are running low on anything go ahead and buy a backup.  The rule in my house is, "If you've used half of it, buy a new one."  If you take prescription medications, you should have an extra month's supply of these on hand at all times.  Also, do yourself a favor and buy a good home medical book and a Red Cross first-aid handbook.  There are quiet a few posts on this blog about home medical supplies and it would be worth your time to read them.

A Radio

A good battery powered or hand-cranked radio will keep you informed about weather conditions and other events that may affect your survival.  You can get little battery powered radios for under $20.00.  A good hand cranked radio with AM/FM, short wave, and weather bands can be purchased for under $100.00.  This is money well spent.  The radio that I have can also be used to recharge a cell-phone.


All of these things listed above are the bare minimum preparedness supplies that I would keep on hand.  If you are looking to prepare for longer term situations please scroll through the posts on this blog.  There is a wealth of information based on personal experience about how to prepare for almost any survival situation.

Thursday, November 29, 2012

The Tennessee Squirrel Cooker


The Tennessee squirrel cooker is a very handy little cooking devise that I always carry with my trail gear.  It only weighs a few ounces and takes up hardly any space.  I stick mine in under the cords holding my bedroll closed, and I never even know it's there until it's time to cook dinner. Pictured below: top, Tennessee squirrel cooker tucked under bedroll straps (note leather cover over fork tines); bottom, squirrel cooker in hand 


It may be called a squirrel cooker, but you can use it to cook a portion or two of just about any kind of meat. I've cooked squirrel, rabbit, beef, chicken, fish, hotdogs, and sausage to name a few.  I've also been know to stick an ear of corn on it to roast.  Pictured below: top, chicken breast cooking on the squirrel cooker; bottom, how squirrel cooker fits together


A friend of mine who is a blacksmith made my squirrel cooker, but you can buy them at mountainman rendezvous or order them on the internet (Woodenhawk Trading Company at woodenhawk.com has them for $15.00 US).

I actually added another piece to my squirrel cooker so that I can use it like a set of miniature fire irons.  This is real handy for suspending my small cook pot over the fire.  Pictured below:  Squirrel cooker with extra piece used as miniature fire-irons
A squirrel cooker won't do much good if you are cooking dinner for a crowd, but if it's just you, or you and a partner, the squirrel cooker will do the job.

Monday, November 19, 2012

Making Jerky in Your Kitchen Stove


Jerked meat was a pioneer staple in the days before refrigeration.  This was, and still is, an excellent way to preserve meat.  It's easy to do, it doesn't require any special equipment, and the meat will keep for months.  In this post I'm going to tell you how to make jerky in your kitchen. 

Jerking meat is a process for reducing the moisture content of the meat to the point where bacteria can no longer grow in the meat.  Meat does not have to be cooked before it is jerked, although some authorities recommend blanching wild meat in boiling water before it is jerked.  Many different meats can be jerked.  Venison, beef, and buffalo are probably the most common.  You want to avoid fatty meats as they will not jerk well and can become rancid or spoiled.  If you buy beef to jerk I would suggest that you buy a very lean roast In this instance I am jerking a round roast that weighs 44 ounces. Pictured below: round roast ready to jerk.

The first step is to slice up the meat.  You want to cut the meat in nice thin strips about a quarter inch thick.  The old timers always sliced their jerky so that the grain of the meat ran up and down the strip.  I have no idea why, but this is the way that I do it because they might have known something that I don’t.
 Pictured below: meat cut into strips.

After you have sliced the meat you need to decide if you want to add spices to the jerky or if you just want it plain.  If you are making jerky to snack on you'll probably want to spice it up.  If you are making jerky to store and use in cooking you will probably want to leave it plain.  When I make snack jerky I marinate it is soy sauce, salt, pepper, and garlic powder.  Sometimes I add a little red pepper or jalapeno juice to make it hotter. 

In this instance I am using about 2 cups of soy sauce, a teaspoon each of salt, black pepper, and garlic, and a half teaspoon or red pepper. Let the meat soak in the marinade for at least 3 hours; over-night is better.  Pictured below: top, spices I use when making snack jerky: bottom, meat marinating in spices.   
To dry the meat out you can use the oven of your cook stove.  I put a pan in the bottom of the oven to catch any drippings off of the meat then drape the strips of meat over the wire cooking racks in the oven.  Turn the oven to its lowest setting (below 200 degrees for sure) and leave the oven door propped open about six inches.  Pictured below: meat on racks ready to jerk
 Check the jerky periodically.  It will probably take about six to eight hours to dehydrate.  The trick to good jerky is to get it dry but not too dry.  You can test the jerky by bending it.  When it is about right it will break when you bent it, but it won't snap.  If it snaps it’s too dry.  Pictured below: finished jerky ready to bag.
 When your jerky is done take it out of the oven and let it cool.  You can store it in zip-lock bags or sealed jars and it will keep for a long time.  Put the bags/jars in the refrigerator and it will keep even longer.  Pictured below: bag of jerky.

This finished batch of jerky weighs in at about twelve ounces, or about one-forth of the weight of the original meat.  This represents a lot of concentrated nutrition, so don’t over-eat on this stuff.  One piece is enough for a meal.

Tuesday, November 13, 2012

Paper Plates as a Survival Tool?


I am all about recycling and reusing stuff.  I try to avoid buying things that are designed to be thrown away.  But I make one serious exception to this rule, and that is that I keep a good supply of paper plates, Styrofoam bowls, plastic cups, and plastic tableware.  Now these items are not for any kind of long-term, end of the world as we know it type of survival scenario.  My paper plates are for short term emergencies, like when there is an ice storm and the power is out for two or three days.

If you don't have paper plates during one of these short term emergencies you have, basically, just three choices about dishes:

Choice 1 - You use your dishes and pile them in the sink and hope that the power comes back on before you run out of dishes.  When the power does come back on you will be faced with a sink full of dirty dishes, covered in dried out food, that have to be washed.

Choice 2 - If you live in the city and your water still works, or if you live in the country and have a generator that will power your well pump; you can rinse the dishes off in cold water.  This will not adequately kill germs on the dishes, and you should not eat off of them again, but at least they won't have crud all over them.  You need to set them aside and give them a real washing when the power comes back on.

Choice 3 - You can put a big pot of water on your gas or wood stove (if you have one), heat the water up, and do dishes the old time way.  Not horrible, but it is kind of a pain.  Especially if the power is out for a week or more, which has happened to us.

So here's what we do now.  We have our supply of paper plates, cups, and etc.  When the power goes out we eat a lot of stuff that doesn't require cooking.  Sandwiches, cereal, fresh and canned fruit, peanut butter, cheese, canned drinks, breakfast bars, Vienna sausages, sardines, almonds, crackers, chips; that sort of thing.  We turn the generator on for a couple of hours a day to keep the refrigerator and freezer cold.  We eat everything off of paper plates, and throw it all away.  No mess to clean up when the power comes back on.

If we just have to cook something on the stove, then we heat up a little water and wash the pots and pans the old time way.  More likely we cook in our cast iron skillets which we hardly ever wash anyway.  We usually just wipe them out or maybe rinse out with a little cold water.

Anyhow, lay in a supply of paper plates and you'll thank me the next time the power's off for a couple of days.

Monday, November 5, 2012

Super Storm Sandy - When Will They Learn?


Super Storm Sandy has once again revealed two of the most destructive beliefs that a human being can have. Number one, "It won't happen to me"; and number two, "If something bad happens someone will take care of me."

Let me start off by saying that my heart goes out to those who had to evacuate and returned to find their homes damaged or destroyed.  I also have some sympathy for everyone who has to deal with the hardships of being without power, food, and water.  I say "some" sympathy because I stress the fact that it should only be a hardship, not a life threatening situation.

For those who chose not to evacuate and then called on first responders to come and rescue them; they should be ashamed, and they should have to pay for the cost of the rescue.  If a responder was injured or killed in the attempt to rescue one of these people then that individual should be charged with reckless endangerment and prosecuted.  If you don't have the guts to follow through, then don't ignore the warning to leave.

For those who are without food, water, light, or heat, please heed these words of advice, IN AN EMERGENCY, YOU CAN'T DEPEND ON ANYONE BUT YOURSELF. 

You have to be prepared for an emergency, and guess what, sometimes you don't have four days warning before the emergency happens, so be prepared ALL the time.  You don't have to build a bunker and buy an arsenal of weapons.  Just do some simple things like store some food and water under your bed; buy a propane or kerosene heater and some fuel for it.  Buy a propane cook stove.  Buy a kerosene or propane lantern and a couple of hand cranked flashlights.  Keep some batteries in the refrigerator and buy a battery powered or hand crank radio.  You can get all of this stuff for less than the price of a Louis Viton bag and a pair of Prada sunglasses.

Did you notice the news footage of stores in the Northeast in the days just before the storm?  People carrying out cases of water, empty shelves everywhere.  It's the same footage we see every time an event like this occurs.  We also hear stories about price gouging and looting every time there's a disaster.  Please, please, do yourself a favor and prepare when times are good for the bad times that will inevitably occur.  You don't wait until your car is skidding toward a tree to buy car insurance.  Go out as soon as you can and buy the things that you need to prepare for a disaster, natural or otherwise. Someday, in the not to distant future, you will be glad that you did.

Thursday, October 25, 2012

The AR-7 Survival Rifle - Review


The AR-7 is a little .22 caliber auto-loader.  It is an interesting gun because the barrel and receiver disassemble and store in the stock making a veer small and lightweight package.  I've always been curious to own one of these little rifles, so when I saw one at a recent gun show for a hundred dollars, I picked it up.  Pictured below: Charter Arms AR-7
 
The AR-7 was designed by Eugene Stoner and manufactured originally by Armalite in hopes that the military would adopt it as a replacement for the AR-5 bolt action survival rifle.  Things didn't work out so Armalite began selling the AR-7 on the civilian market.  Over the years the design and manufacturing right were sold to Charter Arms and then the Henry Co.  The AR-7 that I bought was made by Charter Arms which I have read did not produce the best version of this product.

The stock of the gun is a synthetic that is filled with foam.  Supposedly the gun will float if dropped in water, but I haven't tried this personally.  The barrel is made of aluminum with a rifled steel inner sleeve and unscrews from receiver.  Pictured below: Barrel unscrewed from receiver

A thumb screw on the bottom of the stock allows the receiver to be detached from the stock.   Pictured below:  Screw that holds receiver in place

The barrel, receiver, and magazine can then be stored in the butt of the stock which is closed by snapping the plastic butt-cap back in place.  Pictured below: top, parts of the rifle; bottom, barrel, receiver, and magazine stored in stock


When assembled the rifle is 35 inches long.  Disassembled and with the barrel and receiver stored in the stock, the AR-7 is 16 inches long.  The total weight of this weapon is 2.5 pounds.  Pictured below: AR-7 broken down and packed

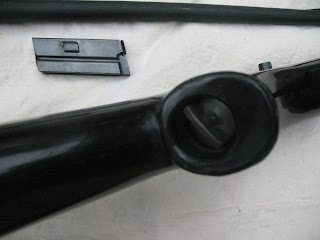
The AR-7 is chambered for .22 longrifle.  It is an auto-loader with a blow-back bolt and double bolt springs.  The factory magazine holds eight rounds. Pictured below: top, Magazine in mag port, bottom, magazine removed


The bolt springs are fairly stiff and will only cycle reliably with high velocity ammo.  .22 longs, short, and CB's will not operate the bolt although they can be single loaded and fired.  Round nose bullets are said to load more reliably, but I always buy hollow points so that's what I am using in this test.

The AR-7 is intended as a survival weapon.  This means small game at fairly close range, so I am going to be firing it on a thirty yard range.  The sight on the AR-7 is a fixed blade on the front with a rear peep-sight that is removable but not adjustable. Pictured below: Rear peep sight

I am no sharpshooter, so I decided that in case I just wasn't shooting any good I would fire from the same distance, and from the same prone position with the AR-7, a Hi Standard .22 revolver, a Savage combo gun in .22 over 20 ga., and a Ruger 10-22.  I could then compare the targets and see how the AR-7 performed against other weapons.

The results were not very favorable for the AR-7.  It was the worst performer of the four weapons fired.  Of the first eight rounds fired through the AR-7, I had two jams.  These jams were not from failure of a round to chamber properly.  They were caused by failure of the extractors to pull the fired rounds from the chamber.  Because the bolt doesn't lock back I had to manually hold the bolt open while pulling out the spent cartridge case with my pocket knife.  A real pain.  Of the eight rounds fired only six cut paper and they were all over the place; no consistent pattern whatsoever.  Pictured below AR-7 target number one.

I ran eight more rounds this time with only one jam, but I only got two rounds on the paper.  I'm not a great shot, but I'm not that bad.  Pictured below: AR-7 target number 2.

Next I fired eight rounds through the Hi Standard revolver.  No misfires and all eight rounds on the target.  Seven of the rounds were within a six inch circle.  Pictured below: Hi Standard revolver and target.


As pictured below the Savage combo put all eight on the paper including one bull, and the Ruger 10-22, predictably, shot the tightest group including one bull.  Pictured below: top, Savage target; bottom, Ruger target


So when all is said and done I would say that if you have the opportunity to buy a Charter Arms AR-7, don't.  If you are looking for light-weight and compactness, a good quality revolver will out perform the Charter Arms AR-7.  I can't tell you about the Armalite or Henry versions of the AR-7, and I have heard that they are of higher quality.  But as for the Charter Arms……..save your money.


Wednesday, October 17, 2012

Survival Dental Care


You definitely want to avoid tooth problems if you no longer have access to modern dental care.  One way to avoid problems in an uncertain future is to take good care of your teeth now.  Regular dental check-ups and cleanings, and daily brushings are a must.

You can stock-pile toothpaste in your emergency supplies if you want to, but it's not really necessary.  Back in the day, the purpose of tooth powder was to clean your teeth, not to give you a brighter, whiter, sexier, better smelling smile like today.  Most people back then used a mixture of salt and baking soda to brush their teeth.  Tooth powder was kept in a can.  You could shake a little out into the palm of your hand, wet the bristles of your tooth brush, dip the bristles down into the powder, and brush away. Pictured below: Home made tooth powder and twig brush.

If a toothbrush was not available, the old-timers would cut a small stick (usually from a gum tree or a willow) and chew the end until it kind of splintered up into a brush.  This improvised brush was then used to brush the teeth. Pictured below: Brush made from gum tree twig

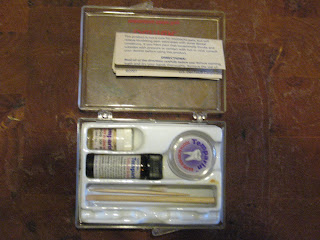
I do keep a few dental items in my emergency supplies.  I have a little dental repair kit that consists of a topical numbing agent, a small wooden spatula, some dental putty to temporarily fill cavities, and some dental adhesive that can be used to temporarily glue on broken crowns or dropped fillings.  Pictured below: Emergency dental repair kit

I also keep a bottle of oil of clove.  Clove oil has been used to treat toothaches for centuries.   

A topical oral anesthetic like Anbesol or Oragel can also be very handy.  Pictured below: Oral topical anesthetic

I have a supply of broad spectrum antibiotics that can be used to help with abscesses and infections.  And I always have a bottle of bourbon and a pair of vice grip pliers.  I guess you could call these my last resort dental care items.  Sure hope I never have to use them.

There is a book available called Where There is No Dentist.  This book is intended for use by aid workers in third world countries, and it is written on a pretty understandable level with the layman in mind. It is available for purchase from the Hesperian foundation or you can download the fairly massive pdf file for free.  Just do a search for "Where There is No Dentist" and you'll see a couple of different places where you can download the book.

Monday, October 8, 2012

Survival Sanitation - The Old Timey Outhouse


Improper disposal of garbage and human waste leads to disease.  In fact, the two greatest factors in increasing human longevity have been improved nutrition and improved sanitation.  Improvements in medical treatment come in third. 

So let's talk about sewage disposal.  What happens when the sewage and water plants shut down?  Well, you better be ready to do something about it yourself.  If you have a septic tank system you can continue to use an indoor toilet, but you will have to haul buckets of water to flush the toilet.  When we have a power outage my water well only works if I have my generator going.  I don't like to run the generator all the time, so I fill up a five gallon plastic bucket with water and set it in the bathroom.  One bucket of water will serve to flush the toilet two or three times.  Another alternative is to buy a portable, chemical toilet; but I find the bucket of water to be easier.  In the city, if the water goes out you will have to use a chemical toilet.  You wouldn't want to waste any of the water that you have to flush a toilet.  If the problem is long-term you're going to need to leave the city anyway, so I wouldn't bother trying to put together an elaborate waste disposal system

For us country folks the old timey outhouse is a long-time tradition.  You still see outhouses in the country, and I just happen to have a working model on my farm.  I'll grant you that it doesn't get used very often, but I have one, and it works!

An outhouse should be located a good distance away from your house.  It should be at least a hundred feet from your home and I would recommend that it be at least two hundred feet from your water well or garden.  An outhouse is basically just a hole in the ground with a seat over the top of it.  The fecal matter falls into the hole where it can decompose.  It is important to treat the waste after each use so that it will not attract flies.  You can do this by sprinkling powdered lime in the hole, or you can do it the old timey way and use hardwood ashes.  I keep a five gallon bucket of lime and a coffee can in my outhouse.  After use you just dip up a little lime and sprinkle away.

I keep toilet tissue in my out house, but back in the day they used pages torn from an old Sear's catalogue or even corn cobs.  Trust me, corn cobs are not the route to go.

One caution about outhouses.  Beware of spiders.  It is a good idea to hang one of those plastic no-pest-strips down under the toilet seat to discourage spiders and other bugs from making a home in your outhouse.

One final word on human waste disposal. Please do not try and compost human waste to use on your garden.  The human digestive tract contains e. coli bacteria, and if any of these bacteria survive the composting process you could have serious problems.  Many of the e. coli outbreaks that you hear about on the news are the result of agricultural workers defecating in the fields as they work.  You can get deadly sick from this bacterium, so be safe and don't fertilize with human waste.

Monday, October 1, 2012

Mosquitoes - More than Just a Nuisance


Note: I wrote this article a couple of years ago but never posted it.  It really is hitting home this year, so I am posting it now.  We have had over 80 cases of West Nile virus and 5 deaths in East Texas this summer; so mosquitoes are a problem even in the “developed” world.  Read, and be warned about these little killers.

Nearly anywhere that you live in this world you will encounter mosquitoes.  Most people these days think of mosquitoes as a nuisance; but the fact is, they are a deadly danger to human health.  Mosquitoes are fairly well controlled in most developed nations, so the diseases that they carry are no longer a major health risk.  In developing nations mosquitoes are responsible for huge numbers of illnesses and deaths, and the cost to these nations is very high in terms of dollars, lost production, and weakening of future generations.

What would happen in developed nations if government agencies could no longer carry out mosquito control programs.  Well just look at the mosquito related health problems in some of the developing nations around the world.  According to a 2010 report of the World Health Organization there are over 225 million cases of malaria (a mosquito borne illness) throughout the world every year. Nearly 800,000 people die from malaria each year.  The majority of these deaths occur in sub-Saharan Africa and most of these victims are children.

Because of changing climate, some mosquito borne diseases, like West Nile virus, that were once considered "tropical" diseases have begun to spread to the temperate zones.  I live in Texas, and in recent years there have been several cases of West Nile virus. This is a disease that has never been known in this area, and it has appeared in spite of the aggressive mosquito control programs that we have.

So the bottom line is: government break-down equals no more mosquito control programs which equals you're on your own as far as preventing mosquito borne illnesses.  You need to prepare for this.  What are some things that you can do to prevent mosquito borne disease?

1. Drain standing water where mosquitoes can breed.

2. Avoid going out at dusk and nighttime (the time when mosquitoes are most active).

3. Wear protective clothing.

4. Wear insect repellant. (You need to lay in a good supply of DEET)

5. Make sure that you have screens on all windows and doors.

6. Sleep under a mosquito net if you are out doors.

Most of these precautions against mosquitoes used to be common place in the USA and other now developed nations, but with modern mosquito control we have fallen out of the habit of protecting ourselves.  It's time to start thinking about them again, because a mosquito can kill you just as dead as a bullet from an AK-47.

Sunday, September 23, 2012

Using a Compass - Backstopping


The best way to deal with getting lost in the wilderness is to not get lost in the first place.  To this end you should always carry a compass and preferably a topo map when headed out into the wilds.  In these modern, hi-tech times many people carry a GPS unit, or have GPS on their smart phones.  I wish I could tell you more about these but you're talking to a guy who only got his first cell phone last year when forced to do so by his loving wife.  I've always held to the belief that simpler is better and more reliable.  An old time magnetic compass doesn't have any batteries to go out, it keeps working after you've fallen into a stream, and you have to bang it pretty hard to break it.  A compass alone is not nearly as useful as a compass used in conjunction with a map, but a compass can keep you going in a straight course which is very hard to do otherwise.

One technique that you can use to keep yourself found with only a compass is called backstopping.  Backstopping cannot be used in every instance but it can be used in many.  Here's how it works.

BACKSTOPPING WITHOUT A MAP

Let's say that you are going hiking in an area that you are unfamiliar with.  All you have is a compass; no map of the area other than the road map or GPS in your car that you used to get to the area.  You arrive at your take off point, say a road-side parking area, and prepare to head out into the woods.  Look at your road map or the GPS screen in your car and see if the road continues in a fairly straight line in both directions from where you are standing.  If it does, the road can serve as your backstop.  Let's say that the road runs pretty much North and South, and you are going to be hiking in an area that is east of the road.  Take a compass reading to verify that you are heading out on a course of, in this case, 90º.  If you become lost or disoriented on your hike, you can follow a compass course of 270º and you will eventually hit your backstop.  This method has its drawbacks.  When you do hit your backstop, you may not know whether you are north or south of the place where your car is parked; but you're still better off than you would be wandering around in the woods.  Railroad lines, utility lines, and pipelines all make good backstops.  They usually follow a straighter and longer course than the average back-country road.

BACKSTOPPING WITH A MAP

Let's take the same scenario as above and assume that you do have a topo map with you.  You hike for several hours and decide it's time to head back to the car.  You orient your map and take bearings on a couple of landmarks to fix your position.  Now you can set a compass course straight for your vehicle.  So you follow your course, hit the road, and there's no vehicle.  Now you don't know if you parked farther to the South or to more to the North of where you came out onto the road.  We've all been there.  There's no way to follow a compass course with that much accuracy over broken ground.  Here's something you can do to help minimize this problem.  Set a course that will deliberately miss your target either to the North or to the South.  If you haven't gone very far into the woods, you may want to aim for a point, say, half-a-mile north of your vehicle.  When you hit your backstop you know that your vehicle is going to be to the south.  The farther away from your target you are, the farther North or South your point of aim should be.  This will help guarantee that variations in your course will not put you on the wrong side of your target.


Monday, September 10, 2012

Telling Time by the Stars


The title of this post is a little misleading.  What I'm really going to show you is how to tell how much time has passed rather than how to tell the exact time.  This is a little trick that my grand-dad taught me when I was a boy.  Grand-dad was a cowboy back in the late 1800's.  In those days a time-piece was an expensive luxury that most working men didn't own, and if a man did have a watch he certainly didn't wear it when doing range work.  But cowhands still had to have some way of telling the approximate time at night so they would know when to change guards on the herd. Here's how they did it, and how you can do the same.  By the way, this only works if you live in the Northern Hemisphere.

First you need to locate the North Star (see my post of 9/3/2012).  Now look for the two constellations Cassiopeia (shaped like the letter "W") and Ursa Major (the big dipper).  If you live in the lower latitudes, like the southern United States or Mexico, you may not be able to see both of these constellations at the same time.  That's not a problem.  As long as you can see one of them this will still work.

OK, the North Star, because it's located directly above the North Pole, appears to stay in the same position in the sky at all times.  The constellations Cassiopeia and Ursa Major appear to rotate in a counter-clockwise direction around the North Star, and they make one complete trip around the North Star every twenty-four hours.

So the first thing the old cowboys would do was take note of the position of the constellations when they went out on night watch.  Pictured below: How the stars might have looked at the beginning of night watch

When the constellations had moved forty-five degrees around the North Star, the cowhand knew that three hours had passed. Pictured below: Position of the constellations three hours later

When the constellations had moved ninety degrees around the North Star, he knew that six hours had passed.  Pictured below: Position of the constellations six hours later

With a little practice a man could tell the passage of time with surprising accuracy.  In the example I just gave I used three hours and six hours to make it easy for you to visualize.  In the old days, night watch was usually in four hour shifts; and the cowboys could read the stars accurately enough to get their timing pretty close to right.