This is the procedure that you follow in order to turn a turkey feather into a usable fletching.
First take a look at the feather, especially the quill in the center of the feather. On the front of the feather the quill is rounded. On the back of the feather the quill has a groove down the center. Pictured below: top, front of turkey feather; bottom, back of turkey feather showing the groove down the center.


Now turn the feather so that the front is laying face up. Use one hand to hold the feather in place, and use a sharp knife, blade held ninety degrees to the quill, and begin gently scraping of the rounded crown of the quill. Scrape all the way down the quill. As you scrape the dark outer surface away, you will begin to see the underlying white pith. Stop scrapping before you get into the actual feathers themselves. Pictured below: scraping the crown off of the quill.

Now take the butt of your knife handle and gently tap along the entire length of the quill. Turn the quill over and tap along the entire length of the back side. The quill should begin to separate down the middle where the groove is located on the back. Pictured below: tapping the quill with knife butt.

You may have to take your knife point to the base of the quill and help it start splitting apart. Pictured below: Using the knife to start a split in the base of the quill.

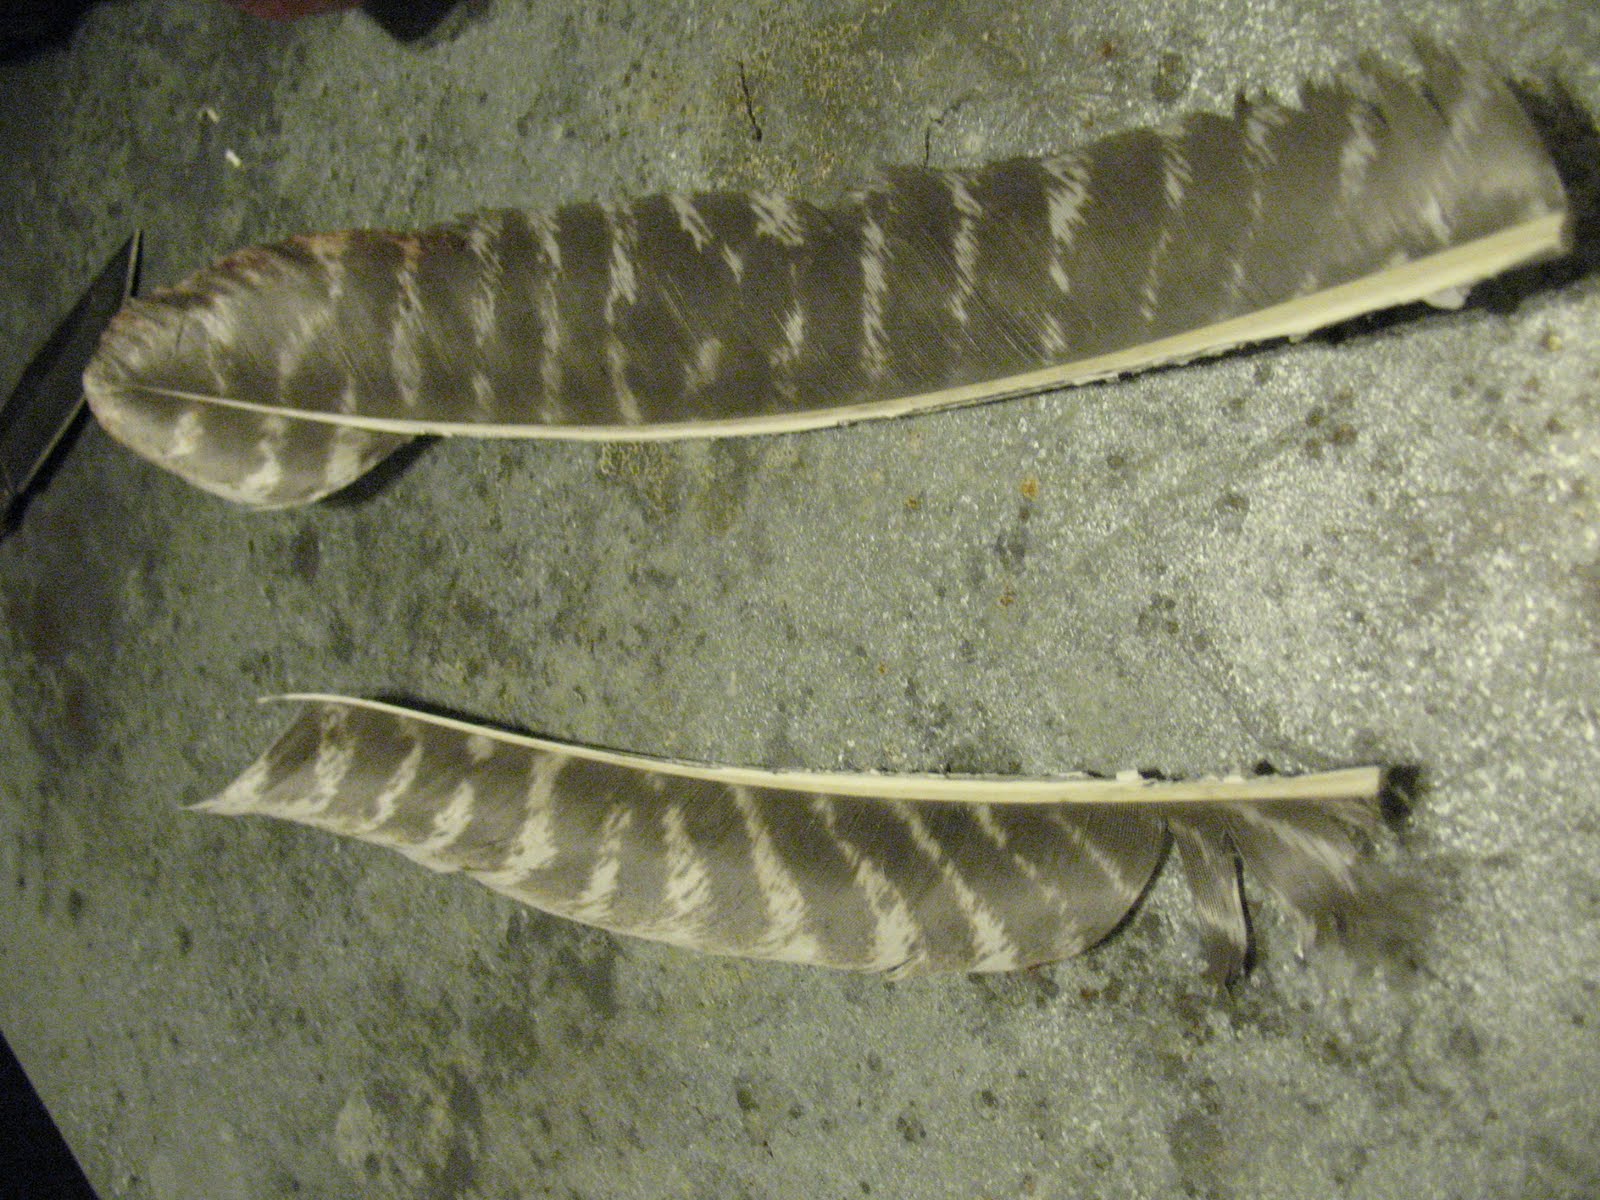
Once the quill starts to split you can use your fingers to gently seperat the two halves. You should now have two separate vanes that can be used for fletchings. Pictured below: top and middle, splitting the quill; bottom, separated vanes.


The quill part of the fletching will probably be thicker than you want. Fix this by scrapping with your knife or rubbing gently with sandpaper. Pictured below: top, scraping the quill with a knife; bottom, sanding the quill.


I usually make my finished fletchings about four inches long. Since I tie the fletching on with deer sinew, there needs to be about three-quarters of an inch of bare quill on the front and back ends of the fletching. So, I cut may fletchings about five and a half inches long and then strip of three-quarters of an inch of feather on each end. Pictured below: top, cutting the vane to length; middle, stripping feathers from the vane; bottom, vane ready to trim or attach to arrow shaft.


The fletching can be trimmed to shape before attachment to the shaft, but I find the it is easier and that the results are more consistent if I trim the final shape after the fletchings are attached to the arrow shaft. Pictured below: top, trimming vane; bottom,trimmed vane.


No comments:
Post a Comment