
But is the blowgun really that useful as a survival tool? To that I would have to say that it would be pretty far down my list of survival items that I would build in a true survival situation. You are going to provide yourself with a lot more usable protein by setting traps and fishing lines than you will ever harvest with a blowgun. The Cherokee, Choctaw, and other Native American tribes in the Southeast United States used blowguns, but from what I understand, they were considered more of a child's or teenager's hunting tool. Children were sent out to shoot birds, squirrels, wood rats, and maybe even rabbits with their blowguns. Adult hunters used bows and arrows. If I were in a true survival situation; I, like the Cherokees, would give a blowgun to my grand children and tell them to go out hunting. This would keep them occupied, and maybe provide a little extra meat for the pot.
Of course blowguns were used for hunting and warfare in South America, but this was with the addition of natural poisons that made the darts much more deadly.
With all that said, let's learn how to make a blowgun. They're fun to make, fun to shoot, and it's a skill that might come in handy some day. We'll start off with the blowgun itself. The native people in my area used River Cane to make blowguns. River Cane is a good choice because it is durable, it doesn't taper down too fast, and (if you select carefully) it doesn't require too much straightening. Pictured below: A nice stand of river cane.

Select your canes carefully. You will want your finished blowgun to be from five to eight feet long, and it must be straight. We will use heat and bending to straighten the cane, but you can keep the work to a minimum by choosing straight canes to start with. Always cut the canes three or four feet longer than you need to allow for splitting on the ends. It is best to cut the cane off just past a joint on each end. Having an intact joint on the end will help the cane hold its shape while it dries. I like to cut canes that are just about one inch outside diameter on the large end and taper down to seven-eights or so on the small end. The hole in the large end of the cane should be about one-half of an inch in diameter, and it should not be much smaller than that on the little end of the cane. When you have cut a good selection of canes, set them aside to dry for a couple of weeks at the minimum. I put them up in the rafters in my shop. If you can find standing dead canes that are still in good shape you can eliminate the drying time.
Once the canes are dry, it is time to straighten them. The procedure for straightening a blowgun cane is the same as for straightening a cane arrow shaft. That is to say that you heat it gently, and then bend it gently, and then hold it in place for 30 or 45 seconds while the cane cools. Of course, given the larger size of a blowgun cane, you have to heat it a little more, bend it a little harder, and let it cool a little longer; but all of the basic principles are the same. Grease the cane if possible before heating. Heat it over coals rather than an open flame if possible, and keep the cane moving so that it doesn't scorch. When you bend the cane, you need to over-bend it just a little. It will spring back a little after you let go of it, and by over-bending just a tad it will probably end up pretty straight. You can straighten the cane at the joints, and you can also straighten it between joints. Sight down the can and turn it after each straightening. This will give you a good visual as to how much progress you are making. Pictured below: top, unstraightened cane; bottom, straightened cane.


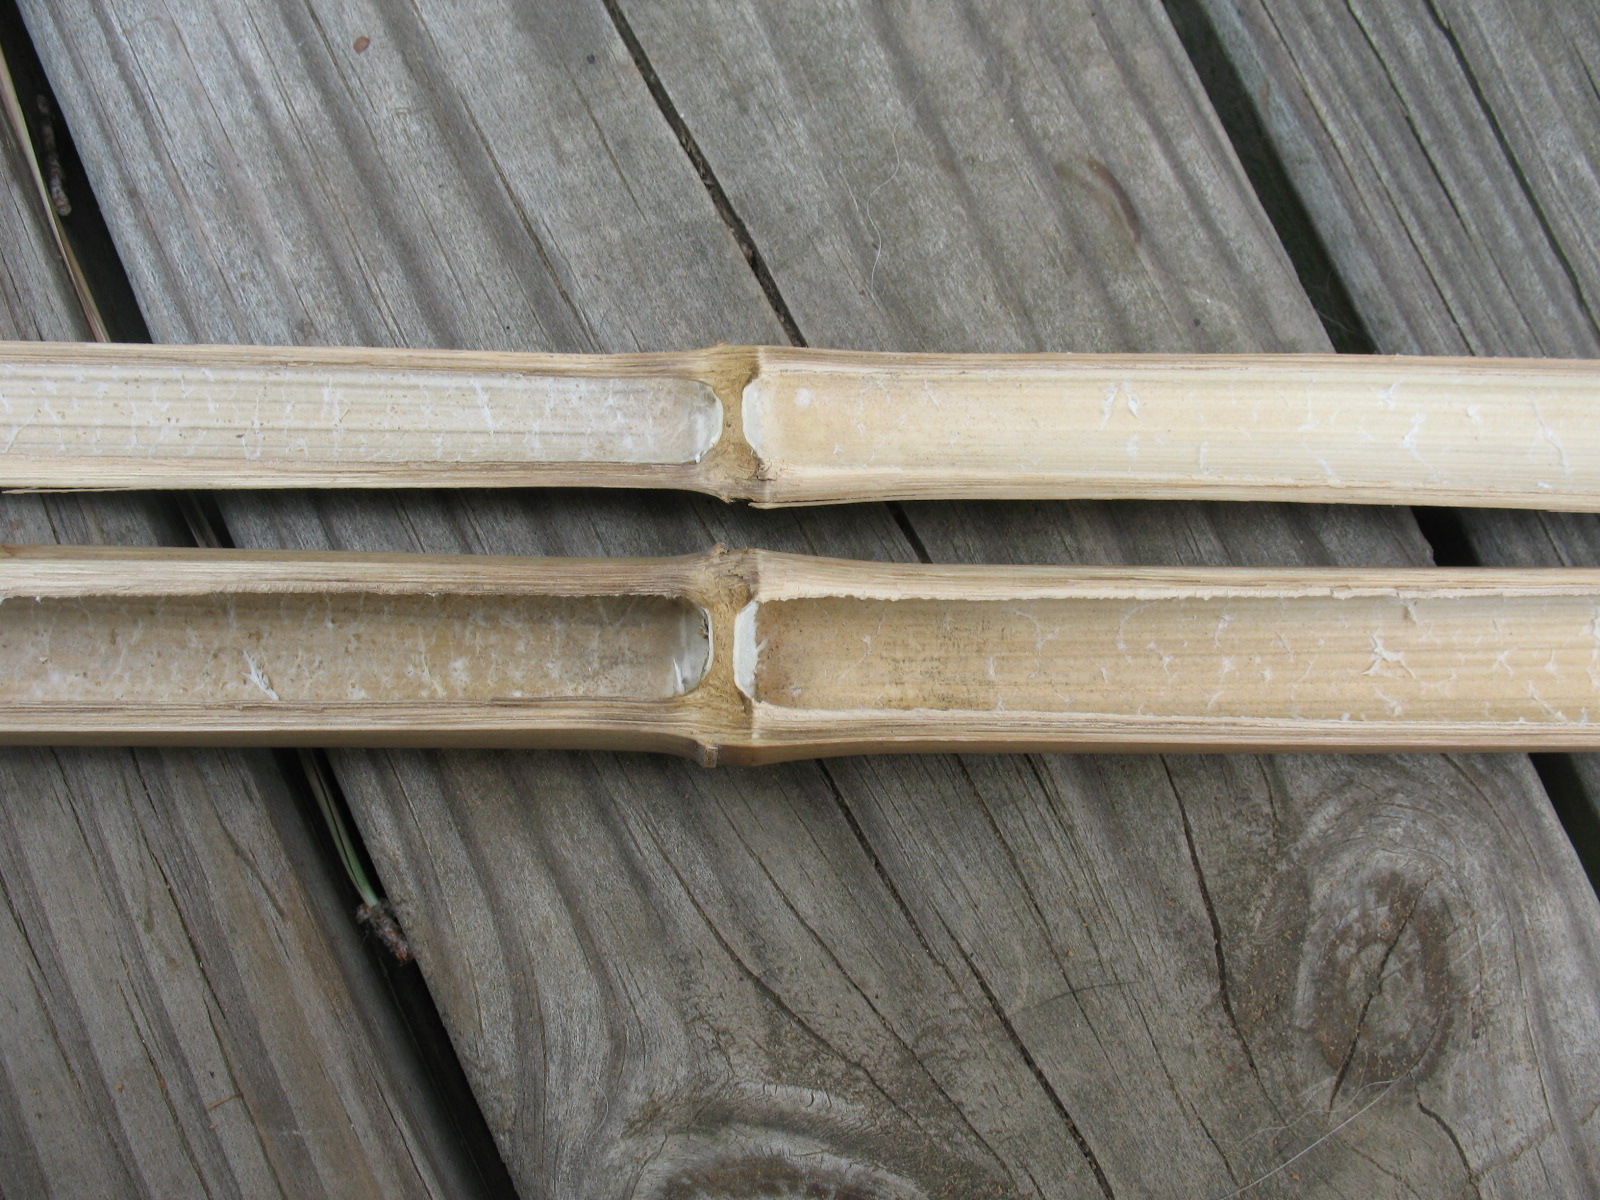
When you have the cane as straight as you can get it, it is time to cut your blowgun to length and remove the joints from inside of the cane so you will have a hollow tube. I personally like to cut the big end of the tube (the part you will be blowing on) so that there is a joint about an inch down from the end. This gives a little strength to the tube. On the front end of the cane I cut off the joint right next to the end. This sounds a little confusing but if you look at the pictures below I think you will see what I mean. Pictured below: top, big end of blowgun; bottom, front end of blowgun.


Now we need to get the joints out of the inside of the cane. Historically there were two different methods used to accomplish this. One method was to split the cane in half, carve the joints out, and then glue the cane back together. Bands of sinew or vegetable fiber were then wrapped around the cane at intervals to help keep it together. Pictured below: top, split cane with joint intact; middle, split cane with joint removed; bottom, cane glued back together and wrapped with sinew.


The second method, and the one I prefer, is to drill the joints out with a special tool that looks like a long, un-fletched arrow. Pictured below: Arrow drill.

Remember that you can drill from both ends of the cane, so the arrow/drill only needs to be a little over half the length of the finished blowgun. The arrow/drill can be turned by hand by rubbing the palms back and forth to turn the drill. Pictured below: top, Inserting arrow/drill in cane ; bottom, using the arrow/drill as a hand drill.


An easier method is to make a little bow and hand-hold, and turn the arrow/drill like you are trying to start a bow-and-drill fire. Pictured below: Using a bow to turn the arrow drill.

I make quite a few blowguns, so I cheat. I took a paddle bit and welded a four foot long steel rod to it. I can chuck this baby up in by electric drill and bore out a blowgun tube in a couple of minutes. Pictured below: Modern drill bit used for blowgun manufacture.

When you have your blowgun finished, it's time to make some darts. That will be the subject of my next post.


1 comment:
I've used this type of blow gun in survival situation with great success that is my heritage of being Choctaw
Post a Comment