First we are going to attach the string to the dart shaft. Take a sharp knife and make a small split in the back end of the shaft. The split shouldn’t be too deep; maybe a half inch. Now take a piece of string (this can be linen string, kite string, a piece of yucca fiber, or anything of a similar size) and cut it about two feet long. Gently wedge the string down into the split that you just made in the dart shaft. Leave about an inch hanging out on one side of the split. Now set the shaft and string aside while you prepare the thistle. Pictured below: top, splitting top of dart shaft; bottom, string inserted in top of dart shaft.


Select one of your thistle heads and cut away all of the spiny leaves around the base of it. Now cut loose the string that is holding it shut. Pictured below: top, untrimed thistle head; middle, removing spiny lower leaves from thistle head; bottom, trimmed thistle head.


Contained inside the thistle head are two kinds of fibers. One is the white down that you will be using. Interspersed within this down are some taller fibers that are more like stiff hairs with a tuft of brown fibers on the top. Pictured below: tall fibers and down.

Because they are taller than the white down, you can wrap your finger and thumb around the thistle head, and gently pull these longer fibers out of the head leaving only the white down. When you have the tall fibers pulled out, you can remove the kind of paper like layer of leaves that surround the outside of the thistle head. Pictured below: top, pulling out tall fibers; bottom, thistle head with tall fibers removed and only down remaining.


Now the only thing remaining to do is to remove the base of the thistle head. Be sure that you have your fingers wrapped around the down when you pull the base off. Otherwise the down will break apart and fly everywhere. There may be some small seeds attached to the bottom of the thistle down. If there are, this is no problem. Just brush your finger gently across the seeds, and they will fall off. Pictured below: removing base of thistle flower.

Now comes the part where three hands would be helpful, but you will have to make do with two hands and your teeth. By the way, the directions that I am about to give are for a right handed person. Hold the thistle down wrapped in your left hand, palm down, with the base of the down sticking out between your encircling thumb and index finger. Hold the dart shaft in your right hand with the pointed end sticking out to your right. Take the long portion of the string between your teeth. Now lay the dart shaft up next to the thistle down with the string going over the top of the down. Pictured below: Beginning wrap around thistle down.

Slowly twist the dart shaft away from you. As the string wraps around the shaft, feed a small amount of the thistle down under the string. This takes practice. You have to feed the down in at a pretty consistent rate or you will end up with lumps of thistle in some spots and bare patches in other spots. Pictured below: Wrap in progress.

As you continue wrapping, make sure that the string is spiraling slowly down the shaft, and keep feeding the thistle down under the string. I usually keep wrapping until I have about two inches of fletching on the dart. Pictured below: Wrap almost complete, down looks really sloppy at this point.

When you have all of the fletching that you want, wrap the string around the front end eight or ten times to finish off the front end neatly; then tie a couple of half hitches in the string to hold it in place. A drop of glue or sap over these wrappings will help hold them in place. Pictured below: Finishing off wrap at front of fletching.

Now hold the dart up and spin it, and blow on it. This will remove any loose down and fluff out the fletching a little. Pictured below: Spinning and blowing the fletching to remove loose down.

Now smooth the fletching down, and if you have any wild fibers sticking out you can use a sharp knife or a pair of scissors to trim up the fletching a little. Pictured below: Trimming the fletching.

That’s it! You’ve just made a traditional thistle blow dart. Pictured below: Finished dart.

The only thing left is to stick it in your blowgun and see how it flies. Pictured below: Loading and shooting dart.


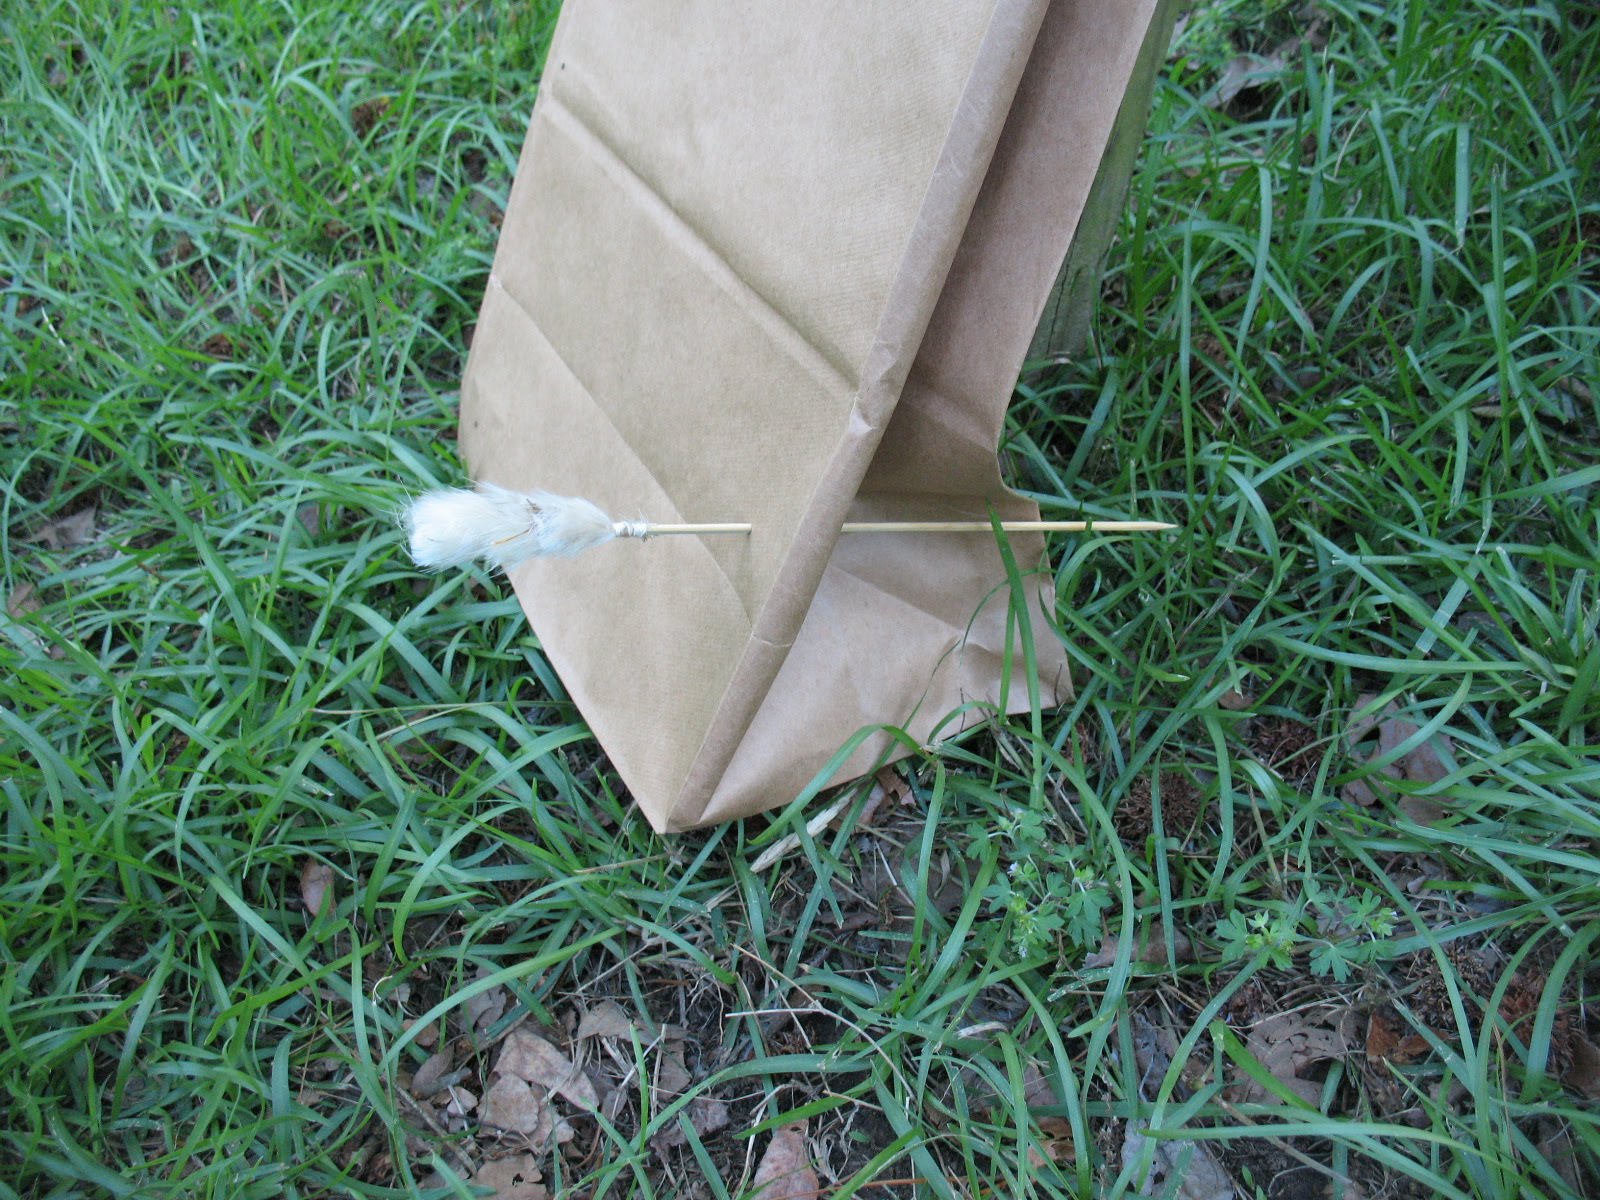
If you did a good job it will fly straight, true, and fast. Don’t be disappointed if you have trouble with this skill. It is one of the harder ones to master, but if you stay with it you will get it down. Pictured below: Dart in target.
My next post will be about how you can fletch darts with raw cotton.


No comments:
Post a Comment